프로그램 사용/iperf2025. 9. 19. 15:46

-A 3 하면 cpu3 에서만 function call interrupts가 많이 올라가고

-A 3-4 나 -A 3/4는 3에서만 올라간다. 정상적으로 구현이 안된건가?


$ cat /proc/interrupts 
            CPU0       CPU1       CPU2       CPU3       CPU4       CPU5       CPU6       CPU7       
 CAL:    5824227    4254156    5919589    3149051    2891279    2950553    2439272    2860177   Function call interrupts
$ man iperf3
       -A, --affinity n/n,m
              Set the CPU affinity, if possible (Linux, FreeBSD, and Windows only).  On both the  client
              and server you can set the local affinity by using the n form of this argument (where n is
              a CPU number).  In addition, on the client side you can override the server's affinity for
              just  that one test, using the n,m form of argument.  Note that when using this feature, a
              process will only be bound to a single CPU (as opposed to a set containing potentialy mul‐
              tiple CPUs).


$ iperf3 --help
Usage: iperf3 [-s|-c host] [options]
       iperf3 [-h|--help] [-v|--version]

Server or Client:
  -p, --port      #         server port to listen on/connect to
  -f, --format   [kmgtKMGT] format to report: Kbits, Mbits, Gbits, Tbits
  -i, --interval  #         seconds between periodic throughput reports
  -F, --file name           xmit/recv the specified file
  -A, --affinity n/n,m      set CPU affinity
  -B, --bind      <host>    bind to the interface associated with the address <host>
  -V, --verbose             more detailed output
  -J, --json                output in JSON format
  --logfile f               send output to a log file
  --forceflush              force flushing output at every interval
  --timestamps    <format>  emit a timestamp at the start of each output line
                            (using optional format string as per strftime(3))
  -d, --debug               emit debugging output
  -v, --version             show version information and quit
  -h, --help                show this message and quit
Server specific:
  -s, --server              run in server mode
  -D, --daemon              run the server as a daemon
  -I, --pidfile file        write PID file
  -1, --one-off             handle one client connection then exit
  --server-bitrate-limit #[KMG][/#]   server's total bit rate limit (default 0 = no limit)
                            (optional slash and number of secs interval for averaging
                            total data rate.  Default is 5 seconds)
  --rsa-private-key-path    path to the RSA private key used to decrypt
                            authentication credentials
  --authorized-users-path   path to the configuration file containing user
                            credentials
Client specific:
  -c, --client    <host>    run in client mode, connecting to <host>
  --sctp                    use SCTP rather than TCP
  -X, --xbind <name>        bind SCTP association to links
  --nstreams      #         number of SCTP streams
  -u, --udp                 use UDP rather than TCP
  --connect-timeout #       timeout for control connection setup (ms)
  -b, --bitrate #[KMG][/#]  target bitrate in bits/sec (0 for unlimited)
                            (default 1 Mbit/sec for UDP, unlimited for TCP)
                            (optional slash and packet count for burst mode)
  --pacing-timer #[KMG]     set the timing for pacing, in microseconds (default 1000)
  --fq-rate #[KMG]          enable fair-queuing based socket pacing in
                            bits/sec (Linux only)
  -t, --time      #         time in seconds to transmit for (default 10 secs)
  -n, --bytes     #[KMG]    number of bytes to transmit (instead of -t)
  -k, --blockcount #[KMG]   number of blocks (packets) to transmit (instead of -t or -n)
  -l, --length    #[KMG]    length of buffer to read or write
                            (default 128 KB for TCP, dynamic or 1460 for UDP)
  --cport         <port>    bind to a specific client port (TCP and UDP, default: ephemeral port)
  -P, --parallel  #         number of parallel client streams to run
  -R, --reverse             run in reverse mode (server sends, client receives)
  --bidir                   run in bidirectional mode.
                            Client and server send and receive data.
  -w, --window    #[KMG]    set window size / socket buffer size
  -C, --congestion <algo>   set TCP congestion control algorithm (Linux and FreeBSD only)
  -M, --set-mss   #         set TCP/SCTP maximum segment size (MTU - 40 bytes)
  -N, --no-delay            set TCP/SCTP no delay, disabling Nagle's Algorithm
  -4, --version4            only use IPv4
  -6, --version6            only use IPv6
  -S, --tos N               set the IP type of service, 0-255.
                            The usual prefixes for octal and hex can be used,
                            i.e. 52, 064 and 0x34 all specify the same value.
  --dscp N or --dscp val    set the IP dscp value, either 0-63 or symbolic.
                            Numeric values can be specified in decimal,
                            octal and hex (see --tos above).
  -L, --flowlabel N         set the IPv6 flow label (only supported on Linux)
  -Z, --zerocopy            use a 'zero copy' method of sending data
  -O, --omit N              omit the first n seconds
  -T, --title str           prefix every output line with this string
  --extra-data str          data string to include in client and server JSON
  --get-server-output       get results from server
  --udp-counters-64bit      use 64-bit counters in UDP test packets
  --repeating-payload       use repeating pattern in payload, instead of
                            randomized payload (like in iperf2)
  --username                username for authentication
  --rsa-public-key-path     path to the RSA public key used to encrypt
                            authentication credentials

[KMG] indicates options that support a K/M/G suffix for kilo-, mega-, or giga-

iperf3 homepage at: https://software.es.net/iperf/
Report bugs to:     https://github.com/esnet/iperf


받거나 보내는 건 각각 1개의 프로세스에서만 하도록 되어있나 보다.

Set the CPU affinity for the sender (-A 2) or the sender, receiver (-A 2,3), where the core numbering starts at 0. This has the same effect as running numactl -C 4 iperf3.

iperf3 -c <dst-ip> -A 2,3 

[링크 : https://docs.nvidia.com/networking-ethernet-software/knowledge-base/Configuration-and-Usage/Monitoring/Throughput-Testing-and-Troubleshooting/]

'프로그램 사용 > iperf' 카테고리의 다른 글

iperf3 udp 속도 테스트 on rpi 4  (0) 2025.09.15
iperf3 jumbo packet?  (0) 2025.02.15
iperf 파일로 바로바로 떨궈서 tail로 보기  (0) 2025.02.10
iperf3  (0) 2023.07.28
iperf udp 테스트  (0) 2022.03.14
Posted by 구차니
Linux2025. 9. 19. 14:44

irq는 0번 cpu에서만 처리하는게 기본이었던 것 같은데

멀티코어 cpu가 기본이 되면서 irqbalance 라는 데몬이 생겨나서

cpu를 옮겨가면서 irq를 처리하는 cpu가 고정되지 않도록 하는 데몬이 생겨났나 보다.

이론적으로야 하나의 cpu가 아닌 돌아가면서 하거나 나눠서 할 것 같은데

옮기면서 처리량이 줄어드는 문제도 있을수 있으니 필요에 따라서는 로드밸런싱을 하지 않는게 유리할수도 있나 보다.


sudo systemctl disable irqbalance
sudo systemctl stop irqbalance

[링크 : https://pak-j.tistory.com/56]

[링크 : https://docs.redhat.com/ko/documentation/red_hat_enterprise_linux_for_real_time/9/html/optimizing_rhel_9_for_real_time_for_low_latency_operation/proc_disabling-the-irqbalance-daemon_assembly_binding-interrupts-and-processes]


아래는 irq의 cpu 할당(affinity)를 지정하는 명령인데 2005년 꺼라..

irqbalance 데몬이랑 어떻게 엮이려나.. 일단 테스트 해봐야 할 것 같다.

근데.. 내 노트북에서는 eth0가 안보이네 usb라서 그런가?

echo 3 > /proc/irq/31/smp_affinity
cat /proc/interrupts
           CPU0       CPU1       CPU2       CPU3      
   0:    4865302    5084964    4917705    5017077    IO-APIC-edge  timer
   1:        132        108        159        113    IO-APIC-edge  keyboard
   2:          0          0          0          0          XT-PIC  cascade
   8:          0          1          0          0    IO-APIC-edge  rtc
  10:          0          0          0          0   IO-APIC-level  usb-ohci
  14:          0          0          1          1    IO-APIC-edge  ide0
  24:      87298      86066      86012      86626   IO-APIC-level  aic7xxx
  31:      93707     106211     107988      93329   IO-APIC-level  eth0

[링크 : https://blog.naver.com/didorito/60012935114]

[링크 : https://docs.redhat.com/ko/documentation/red_hat_enterprise_linux/6/html/performance_tuning_guide/s-cpu-irq]

'Linux' 카테고리의 다른 글

sudo time  (0) 2025.09.17
dd 로 덤프 하면서 바로 압축하기  (0) 2025.07.24
gpiod - gpiomon  (0) 2025.07.17
scrub  (0) 2025.02.04
Block SCSI generic (bsg) driver  (0) 2024.04.16
Posted by 구차니
개소리 왈왈/컴퓨터2025. 9. 18. 23:11

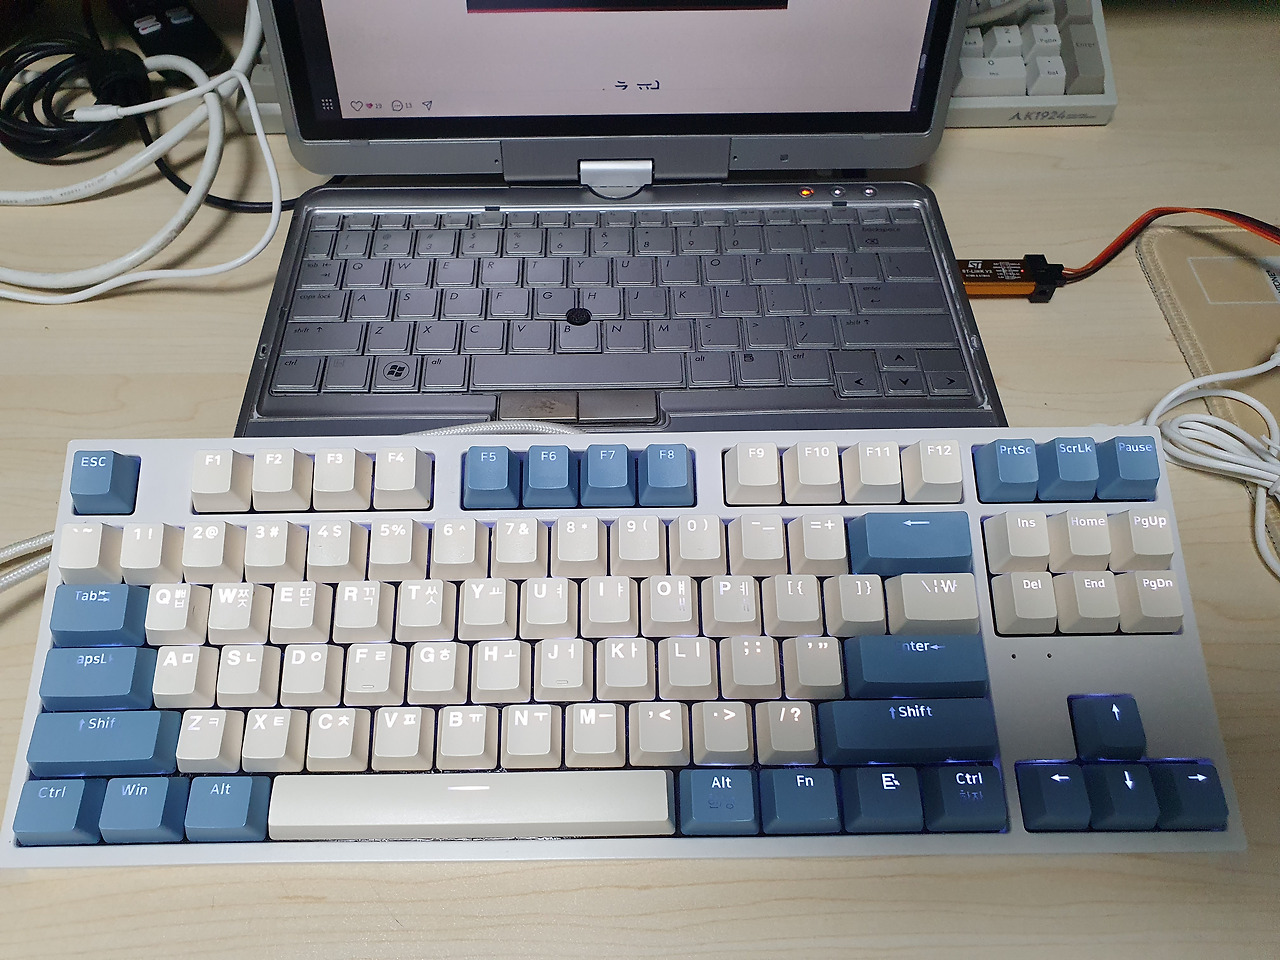
중고로 구매함(1.8 -> 1.5)

첫 인상은 조용하다?

이전에 청축을 쓰다 보니 소리가 어마어마 했는데

확실히 아내가 시끄럽다고 할 만했구나 생각이 든다.


박스는 생각외로 두껍다. 머.. 키보드가 높이 5cm는 족히되는 듯.


투명 커버가 이쁘긴 하다. 그런데 머.. 버릴까 고민되는 중 ㅋ


PC방 자산 스티커는 좀 작게 해서 우측 상단에 빈 공간이 있는데 거기 붙이게 하지 이렇게 어중간하게 크게 했나 싶긴하다.

다행히 중고로 샀지만 모든 물품은 다 들어있는 듯.


레트로를 표방했으면 멀티미디어 기능키를 차라리 빼던가

넣을거면 키캡에 먼가 그려주긴 하던가 해야지?!?!?


다만 청축대비 밋밋한(?) 타건감이라고 하야하나? 누르는 맛이 약하긴 하다. 그러니까 조용한거겠지만. 

키압은 45g 이라는데 이전 청축보다 확실히 가벼운건지

아니면 거의 리니어하게 꾸준히 45g 이라서 반발이 적은건지 모르겠지만

청축때 보다는 확실히 가볍게 타이핑이 되는 느낌이다.

다이소 멤브레인 보다 더 가볍게 눌리는 느낌이라 부드러워서 좋다고 해야하나

무게감이 없어서 허전하다고 해야하나 ㅎㅎ

[링크 : https://prod.danawa.com/info/?pcode=28450715]


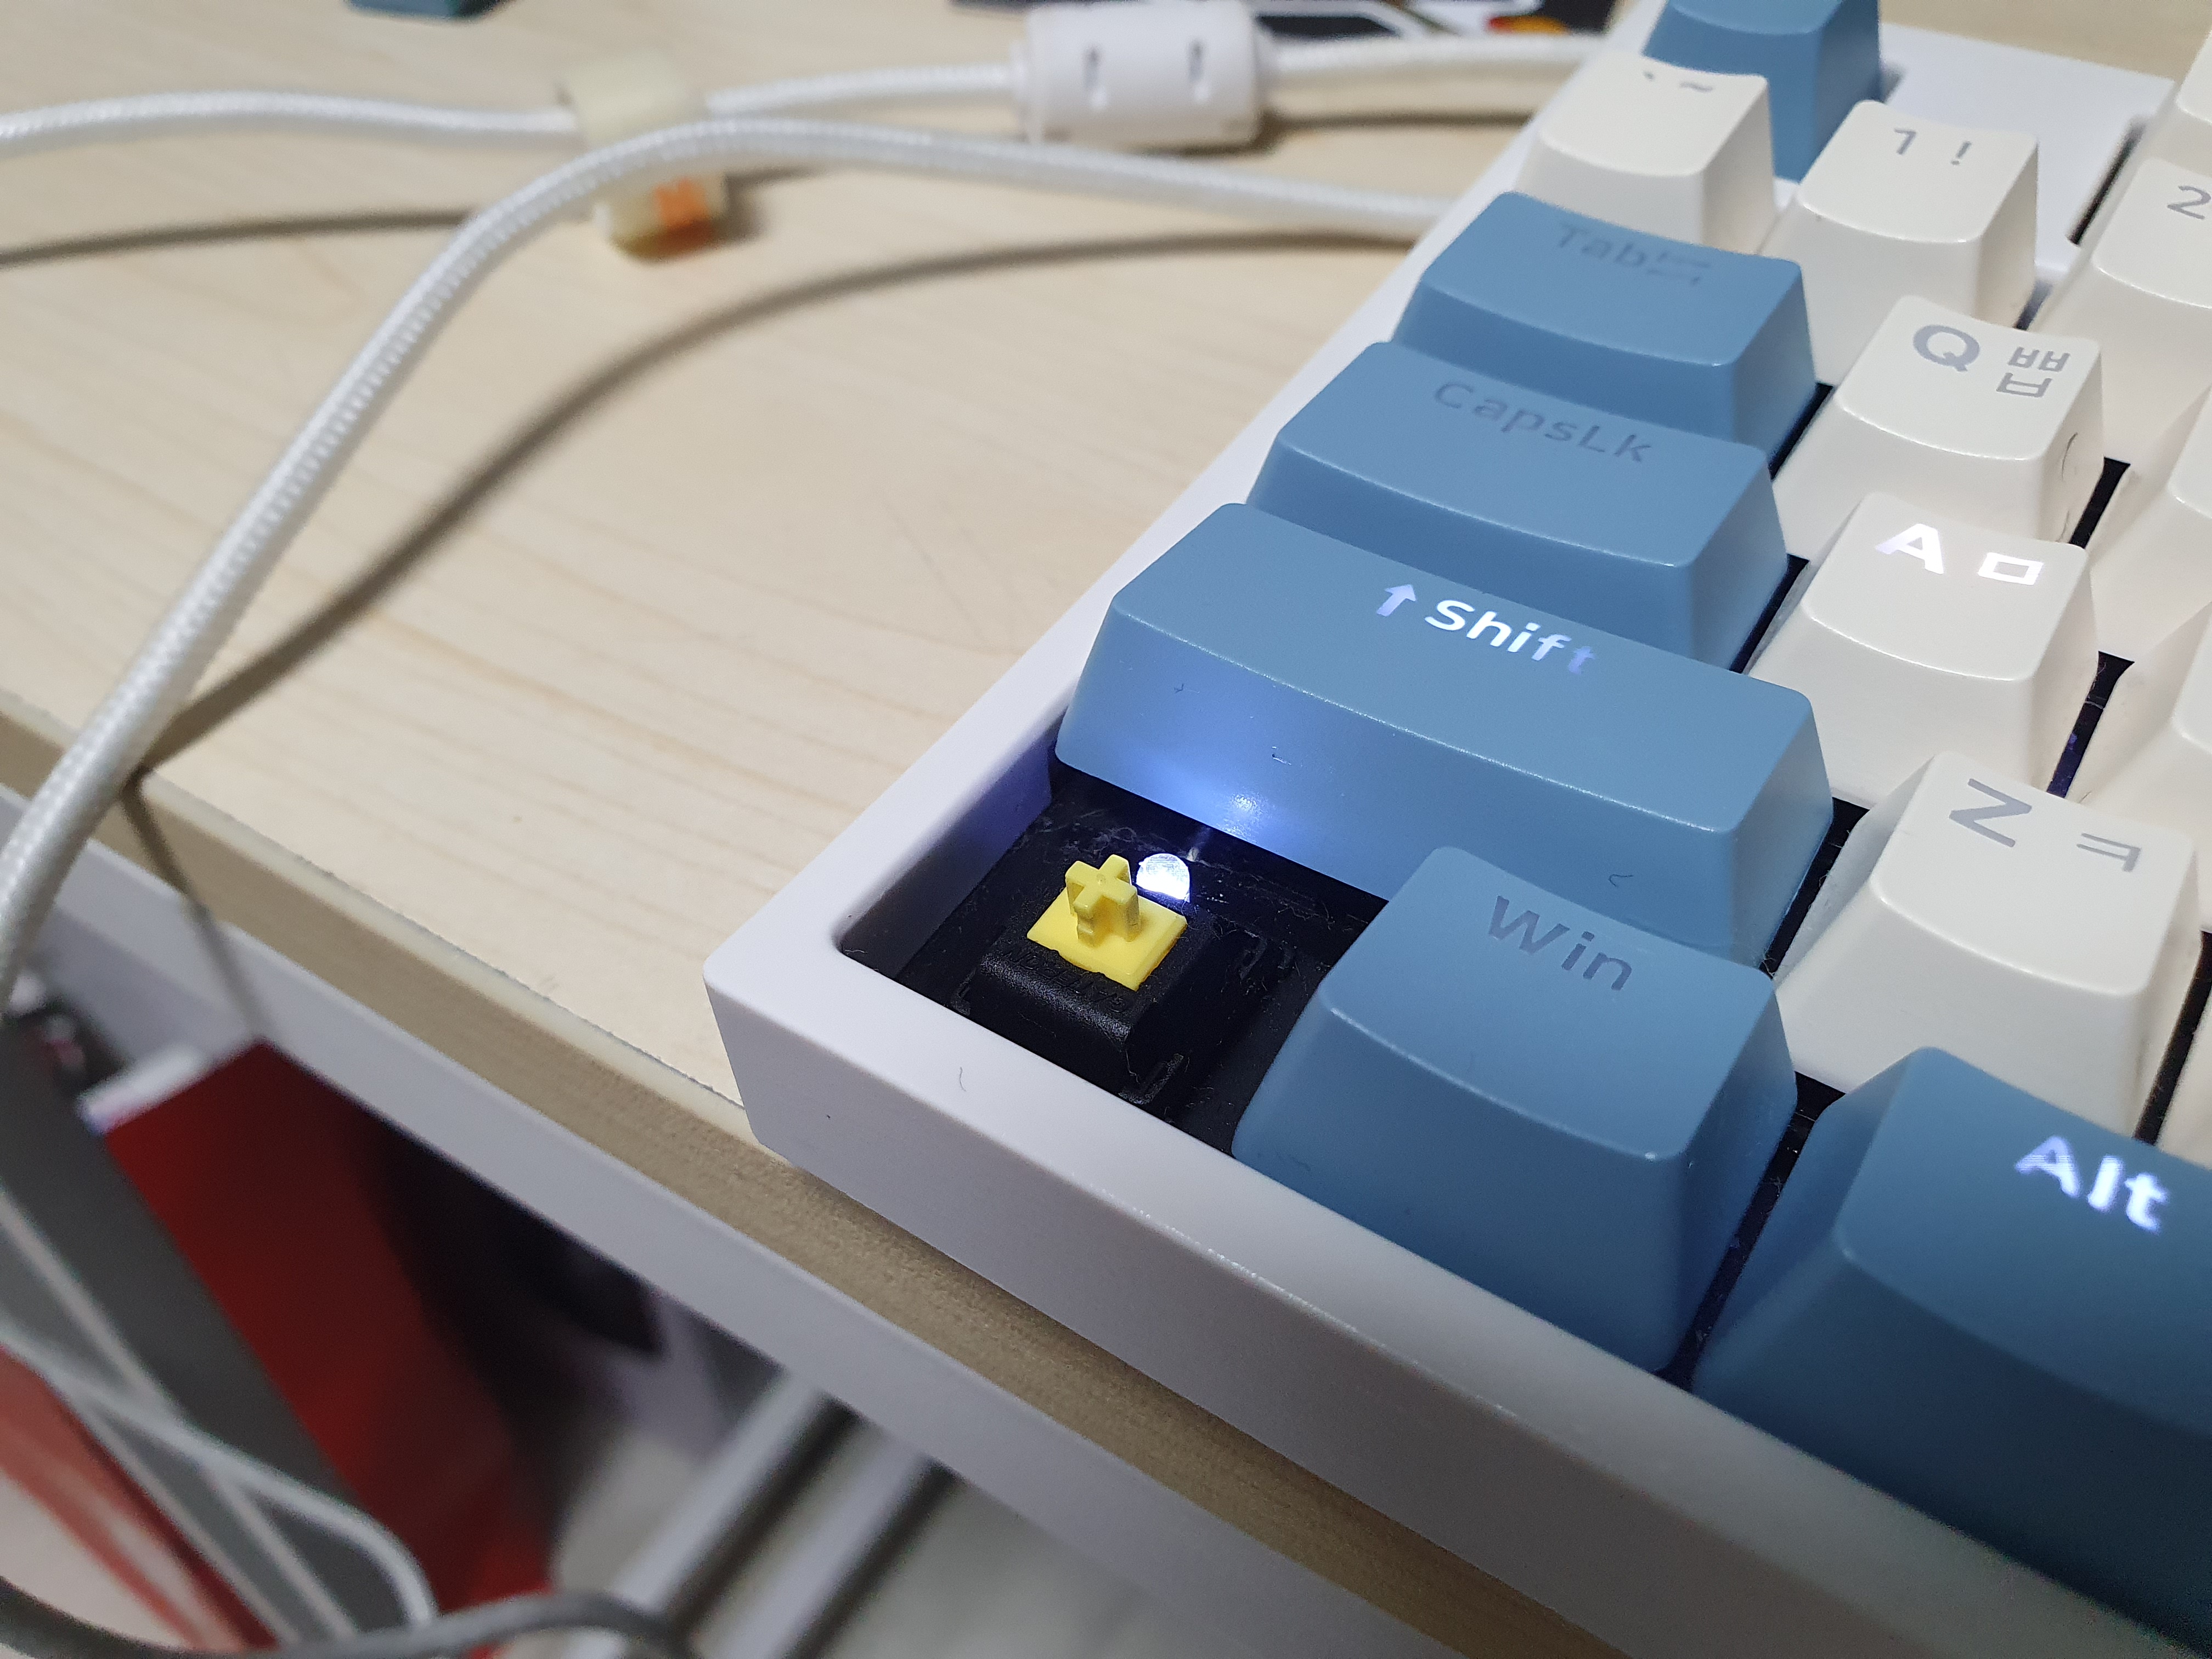
LED 인디케이터는 먼가 좀 너무 좁게 되어 있어서 아쉬운데


그 와중에 화이트 LED다. 레트로 갬성이라매???


아무튼 개인적으로 아쉬운 점은 레트로로 가려고 했으면 확실하게(?)

LED 도 키패드 넓이만큼 넓혀서 녹색 LED로 하면 더 좋지 않았을까 하는 생각이 든다.

옛날에는 다 이런 갬성이었으니까? ㅎㅎ

[링크 : https://baboaqs.gitlab.io/post/2018-10-14-old_keyboard_lgibm/]


일단은 아직까지는 대만족중

회사랑 집에 하나씩 놓고 쓸까 싶어진다.

'개소리 왈왈 > 컴퓨터' 카테고리의 다른 글

빔 프로젝터 구매 고민  (0) 2025.10.24
lg sh5 hdmi arc  (0) 2025.09.22
알리알리 알라성 알라리 알라 망했네?  (0) 2025.09.18
알리 부품 도착  (0) 2025.09.16
키보드 수리 2  (0) 2025.09.14
Posted by 구차니

신규 보드 (A) 나와서 코드 수정하고

신규 보드 (B) 나와서 빌드고 굽는데 간이 테스트 하는데 안켜저서 멘붕

B 보드의 구버전 가지고 하는데 켜지는데(리부팅 안하고 펌웨어만 jtag으로 올림)

B 보드의 신버전은 jtag으로 올려도 깜깜 무소식.

디버깅 모드로 해야지 콘솔로 먼가 좀 뜨다 마는데


만든 사람에게 연락하니 디버깅 해보라고 1차 멘붕

1시간 정도 스턴 걸려 있는데

나중에 전화와서 부트로더 추가했다고 올려보라고 한다.


아니.. 그정도 중대 변경사항은 이야기를 해줘야지 ㅠㅠ

'개소리 왈왈 > 직딩의 비애' 카테고리의 다른 글

내일은 월요일  (0) 2025.10.12
10월의 시작  (0) 2025.10.01
복리 / 단리  (0) 2025.09.17
외근  (0) 2025.09.09
압박붕대  (2) 2025.08.25
Posted by 구차니
개소리 왈왈/컴퓨터2025. 9. 18. 10:40

pcie x1 lane 에 딱 꽂아서 상큼하게 쓰려고 했는데

히트싱크 + 쿨러 높이가 슬롯 1개를 넘어서

그래픽 카드를 간섭하는 바람에 꽂을수가 없게 되었다.

btx 라고 해야하나 mATX라고 해야하나 x1 랑 x16 딱 두개만 있는 녀석이라

이거 답이 안나오게 되었네..

이렇게 된 김에 m.2 * 1 / pcie x16 * 1 지원하는 세대로 갈아타야하나? (배보다 배꼽이 커지는 중)


'개소리 왈왈 > 컴퓨터' 카테고리의 다른 글

lg sh5 hdmi arc  (0) 2025.09.22
abko k1924 적축 키보드 구매  (2) 2025.09.18
알리 부품 도착  (0) 2025.09.16
키보드 수리 2  (0) 2025.09.14
SK-8845RC USB 포트  (0) 2025.09.10
Posted by 구차니
하드웨어/Network 장비2025. 9. 17. 16:51

엥.. 예전에 본거 같은데 찾다보니 지원 안하는 모델인가..

회사꺼 T24000M 인데 지원안함.. 포트트렁킹만 보임

[링크 : https://intotw.tistory.com/172]

'하드웨어 > Network 장비' 카테고리의 다른 글

fc san  (0) 2025.03.08
modinfo bnx2x (BCM957810)  (0) 2025.02.26
랜카드 sr-iov 설정  (0) 2025.02.26
ubuntu 네트워크 연결되지 않음 40초 간격  (0) 2025.02.26
BCM957810A1008G 히트싱크 분해  (0) 2025.02.24
Posted by 구차니

tflite 에서 weight만 빼서 거기서 부터 학습 시키면 그게 fine tune / transfer learning(전이학습)이 되는건가?

The conversion from a TensorFlow SaveModel or tf.keras H5 model to .tflite is an irreversible process. Specifically, the original model topology is optimized during the compilation by the TFLite converter, which leads to some loss of information. Also, the original tf.keras model's loss and optimizer configurations are discarded, because those aren't required for inference.

However, the .tflite file still contains some information that can help you restore the original trained model. Most importantly, the weight values are available, although they might be quantized, which could lead to some loss in precision.

The code example below shows you how to read weight values from a .tflite file after it's created from a simple trained tf.keras.Model.


import numpy as np
import tensorflow as tf

# First, create and train a dummy model for demonstration purposes.
model = tf.keras.Sequential([
    tf.keras.layers.Dense(10, input_shape=[5], activation="relu"),
    tf.keras.layers.Dense(1, activation="sigmoid")])
model.compile(loss="binary_crossentropy", optimizer="sgd")

xs = np.ones([8, 5])
ys = np.zeros([8, 1])
model.fit(xs, ys, epochs=1)

# Convert it to a TFLite model file.
converter = tf.lite.TFLiteConverter.from_keras_model(model)
tflite_model = converter.convert()
open("converted.tflite", "wb").write(tflite_model)

# Use `tf.lite.Interpreter` to load the written .tflite back from the file system.
interpreter = tf.lite.Interpreter(model_path="converted.tflite")
all_tensor_details = interpreter.get_tensor_details()
interpreter.allocate_tensors()

for tensor_item in all_tensor_details:
  print("Weight %s:" % tensor_item["name"])
  print(interpreter.tensor(tensor_item["index"])())

[링크 : https://stackoverflow.com/questions/59559289/is-there-any-way-to-convert-a-tensorflow-lite-tflite-file-back-to-a-keras-fil]


읽어오든.. tf.keras.application.MobileNetV2 해서 만들던 weight의 유무를 제외하면 동일하게 불러오는건가 보다.

# Create the base model from the pre-trained model MobileNet V2
IMG_SHAPE = IMG_SIZE + (3,)
base_model = tf.keras.applications.MobileNetV2(input_shape=IMG_SHAPE,
                                               include_top=False,
                                               weights='imagenet')
#or load your own
#base_modeltf.saved_model.load("./pretrained_models/ssd_mobilenet_v2_320x320_coco17_tpu-8/saved_model")

[링크 : https://www.aranacorp.com/en/training-a-tensorflow2-model-with-keras/]


다시 찾아보니 keras쪽 표현으로

transfer-learning은 기존의 값을 변화시키지 않고 추가 레이어에 학습시키는 것 같고

The typical transfer-learning workflow
This leads us to how a typical transfer learning workflow can be implemented in Keras:

Instantiate a base model and load pre-trained weights into it.
Freeze all layers in the base model by setting trainable = False.
Create a new model on top of the output of one (or several) layers from the base model.
Train your new model on your new dataset.
Note that an alternative, more lightweight workflow could also be:

Instantiate a base model and load pre-trained weights into it.
Run your new dataset through it and record the output of one (or several) layers from the base model. This is called feature extraction.
Use that output as input data for a new, smaller model.


First, instantiate a base model with pre-trained weights.

base_model = keras.applications.Xception(
    weights='imagenet',  # Load weights pre-trained on ImageNet.
    input_shape=(150, 150, 3),
    include_top=False)  # Do not include the ImageNet classifier at the top.
Then, freeze the base model.

base_model.trainable = False


Create a new model on top.

inputs = keras.Input(shape=(150, 150, 3))
# We make sure that the base_model is running in inference mode here,
# by passing `training=False`. This is important for fine-tuning, as you will
# learn in a few paragraphs.
x = base_model(inputs, training=False)
# Convert features of shape `base_model.output_shape[1:]` to vectors
x = keras.layers.GlobalAveragePooling2D()(x)
# A Dense classifier with a single unit (binary classification)
outputs = keras.layers.Dense(1)(x)
model = keras.Model(inputsoutputs)
Train the model on new data.

model.compile(optimizer=keras.optimizers.Adam(),
              loss=keras.losses.BinaryCrossentropy(from_logits=True),
              metrics=[keras.metrics.BinaryAccuracy()])
model.fit(new_dataset, epochs=20, callbacks=..., validation_data=...)


fine tuning은 모델 자체의 가중치를 변경시킬수 있도록 해서, 천천히 학습 시키는 것 같다.

Fine-tuning
Once your model has converged on the new data, you can try to unfreeze all or part of the base model and retrain the whole model end-to-end with a very low learning rate.

This is an optional last step that can potentially give you incremental improvements. It could also potentially lead to quick overfitting – keep that in mind.

It is critical to only do this step after the model with frozen layers has been trained to convergence. If you mix randomly-initialized trainable layers with trainable layers that hold pre-trained features, the randomly-initialized layers will cause very large gradient updates during training, which will destroy your pre-trained features.

It's also critical to use a very low learning rate at this stage, because you are training a much larger model than in the first round of training, on a dataset that is typically very small. As a result, you are at risk of overfitting very quickly if you apply large weight updates. Here, you only want to readapt the pretrained weights in an incremental way.


This is how to implement fine-tuning of the whole base model:

# Unfreeze the base model
base_model.trainable = True

# It's important to recompile your model after you make any changes
# to the `trainable` attribute of any inner layer, so that your changes
# are take into account
model.compile(optimizer=keras.optimizers.Adam(1e-5),  # Very low learning rate
              loss=keras.losses.BinaryCrossentropy(from_logits=True),
              metrics=[keras.metrics.BinaryAccuracy()])

# Train end-to-end. Be careful to stop before you overfit!
model.fit(new_dataset, epochs=10, callbacks=..., validation_data=...)

[링크 : https://keras.io/guides/transfer_learning/]


+

[링크 : https://89douner.tistory.com/270] vgg16 기준 추가학습


SavedModel 형식과 비교하여 H5 파일에 포함되지 않은 두 가지가 있습니다.

model.add_loss() 및 model.add_metric()을 통해 추가된 외부 손실 및 메트릭은 저장되지 않습니다(SavedModel과 다름). 모델에 이러한 솔실 및 메트릭이 있고 훈련을 다시 시작하려면 모델을 로드한 후 이러한 손실을 다시 추가해야 합니다. 이는 self.add_loss() 및 self.add_metric()을 통해 레이어 내부에서 생성한 손실/메트릭에는 적용되지 않습니다. 이러한 손실 및 메트릭은 레이어가 로드되는 한 레이어의 call 메서드의 일부이기 때문에 계속 유지됩니다.
사용자 정의 레이어와 같은 사용자 정의 객체의 계산 그래프는 저장 파일에 포함되지 않습니다. 로드 시 Keras는 모델을 다시 구성하기 위해 이러한 객체의 Python 클래스/함수에 액세스해야 합니다. 사용자 정의 객체를 참고하세요.

[링크 : https://www.tensorflow.org/guide/keras/save_and_serialize?hl=ko]

'프로그램 사용 > yolo_tensorflow' 카테고리의 다른 글

keras ssd mobilenet  (0) 2025.09.16
mobilenet 학습시키기 with keras, tensorflow  (0) 2025.09.15
ssd mobilenet  (0) 2025.09.11
LLM 시각화  (0) 2025.09.06
모델 학습  (0) 2025.09.05
Posted by 구차니

요즘은 복리 보기 힘들은데

이자가 쩝..


아무튼 이자율이 자꾸 떨어지니 3개월 예금으로는 복리처럼 써먹기 힘들 것 같긴하다


2백만원에 2.8% 라고 가정하고 1년 넣으면 세전 56000원 이자

2백만원에 3개월 마자 이자 포함 자동 재예치 하고 2.8% 1년 넣으면 세전 56590원 고작이긴 하지만 590원 더 받는다.

그런데 이자율이 요즘 하락이라


3개월뒤 더 떨어진다고 가정하면

그냥 처음 이자 그나마 높을때 묶어 둔게 유리한 상황


요즘 시대에(?) 이자가 올라갈 확율이 거의 없으니

목돈 있으면 그냥 예금으로 1년 단위로 묶는게 나을것 같긴한데

야곰야곰 늘어나는 재미도 있으니 머 ㅋㅋ

'개소리 왈왈 > 직딩의 비애' 카테고리의 다른 글

10월의 시작  (0) 2025.10.01
멘탈 크래시 크래시  (0) 2025.09.18
외근  (0) 2025.09.09
압박붕대  (2) 2025.08.25
어우 피곤  (0) 2025.08.05
Posted by 구차니
Linux2025. 9. 17. 11:14

엥....?? 일반권한이랑 root 권한이랑 출력포맷이 다르네?

무슨 dd 한번 썼다고 시스템 크래시 난 줄 -_-

$ cat nvme.log 
$ sudo time dd if=/dev/zero of=test bs=1G count=1 conv=fsync
1+0 records in
1+0 records out
1073741824 bytes (1.1 GB, 1.0 GiB) copied, 5.92836 s, 181 MB/s
0.00user 1.06system 0:06.00elapsed 17%CPU (0avgtext+0avgdata 1051008maxresident)k
0inputs+2097152outputs (0major+262242minor)pagefaults 0swaps


time 자체는 하나인데 권한에 따라서 포맷이나 옵션이 다르게 작동하는 것 같다.

$ whereis time
time: /usr/bin/time /usr/share/man/man7/time.7.gz /usr/share/man/man2/time.2.gz /usr/share/man/man3/time.3am.gz /usr/share/man/man3/time.3avr.gz /usr/share/man/man1/time.1.gz /usr/share/info/time.info.gz


$ sudo whereis time
time: /usr/bin/time /usr/share/man/man7/time.7.gz /usr/share/man/man2/time.2.gz /usr/share/man/man3/time.3am.gz /usr/share/man/man3/time.3avr.gz /usr/share/man/man1/time.1.gz /usr/share/info/time.info.gz


$ ls -al /usr/bin/time
-rwxr-xr-x 1 root root 27160  3월 25  2022 /usr/bin/time


일반 유저는 -v를 쓸 수 없는 것 같고

$ time ls

real 0m0.004s
user 0m0.001s
sys 0m0.003s


root 에서 -p를 주면 원래 보면 포맷이긴 한데 시간 정밀도가 떨어진다. 왜지?

$ sudo time -p ls
real 0.00
user 0.00
sys 0.00


$ sudo time ls
0.00user 0.00system 0:00.00elapsed 66%CPU (0avgtext+0avgdata 2432maxresident)k
0inputs+0outputs (0major+106minor)pagefaults 0swaps


$ sudo time -v ls
Command being timed: "ls"
User time (seconds): 0.00
System time (seconds): 0.00
Percent of CPU this job got: 90%
Elapsed (wall clock) time (h:mm:ss or m:ss): 0:00.00
Average shared text size (kbytes): 0
Average unshared data size (kbytes): 0
Average stack size (kbytes): 0
Average total size (kbytes): 0
Maximum resident set size (kbytes): 2432
Average resident set size (kbytes): 0
Major (requiring I/O) page faults: 0
Minor (reclaiming a frame) page faults: 107
Voluntary context switches: 1
Involuntary context switches: 0
Swaps: 0
File system inputs: 0
File system outputs: 0
Socket messages sent: 0
Socket messages received: 0
Signals delivered: 0
Page size (bytes): 4096
Exit status: 0


도움말에 먼가 보이긴 한데..

언제부터 이렇게 바뀐겨? root로 시간 측정할 일이 없으니.. 당황했네

$ man time
FORMATTING THE OUTPUT
       The format string FORMAT controls the contents of the time output.  The
       format string can be set using the `-f' or `--format', `-v' or
       `--verbose', or `-p' or `--portability' options.  If they are not
       given, but the TIME environment variable is set, its value is used as
       the format string.  Otherwise, a built-in default format is used.  The
       default format is:
         %Uuser %Ssystem %Eelapsed %PCPU (%Xtext+%Ddata %Mmax)k
         %Iinputs+%Ooutputs (%Fmajor+%Rminor)pagefaults %Wswaps

'Linux' 카테고리의 다른 글

proc fs smp_affinity  (0) 2025.09.19
dd 로 덤프 하면서 바로 압축하기  (0) 2025.07.24
gpiod - gpiomon  (0) 2025.07.17
scrub  (0) 2025.02.04
Block SCSI generic (bsg) driver  (0) 2024.04.16
Posted by 구차니

3월 17일에

3개월 / 200만원 묶는데 2.8%


6월 17일에

3개월 / 200만원 묶는데 2.5%


9월 17일에

3개월 / 200만원 묶는데 2.4%


장기로 묶는게 유리하려나

'개소리 왈왈 > 정치관련 신세한탄' 카테고리의 다른 글

콜래트럴 데미지  (0) 2025.06.03
전장련 시위 시작  (0) 2025.04.21
보수(保守)는 보수(報酬)를 먹고 자란다  (0) 2025.04.18
윤석열 탄핵  (0) 2025.04.04
제주항공 무안공항 대참사  (0) 2024.12.29
Posted by 구차니