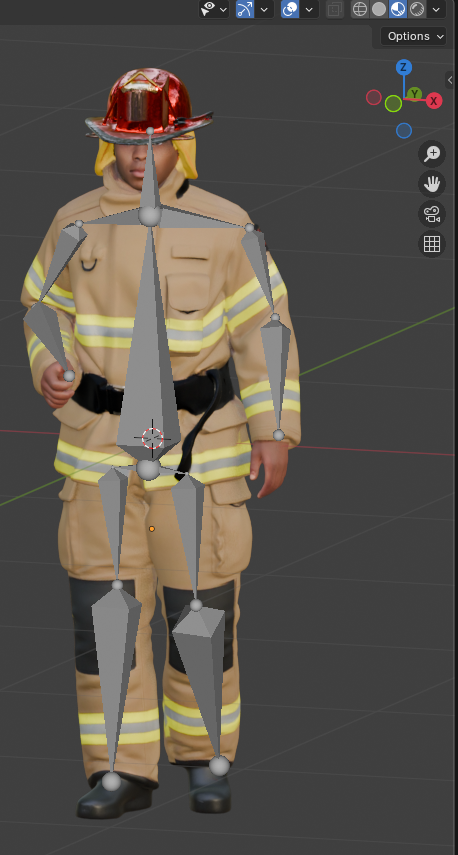
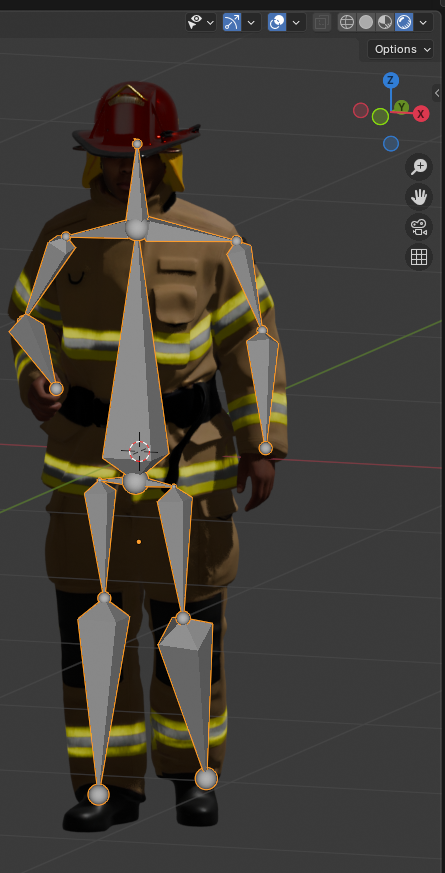
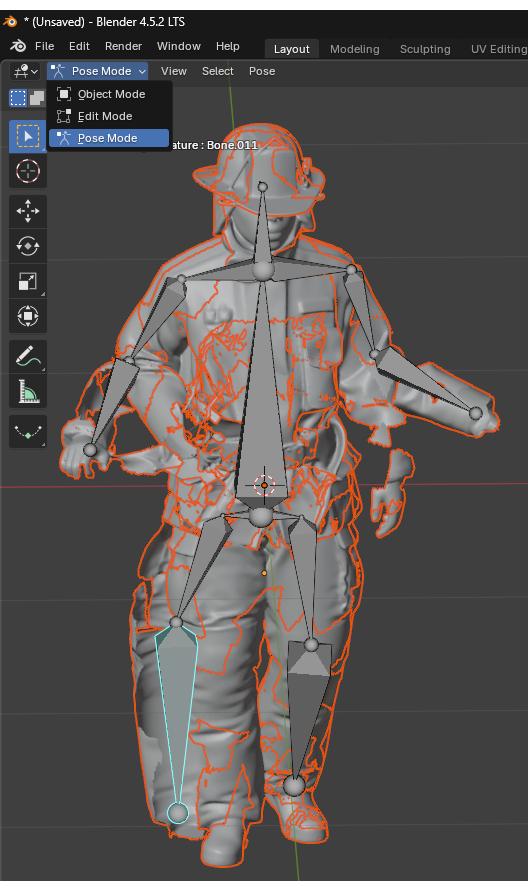
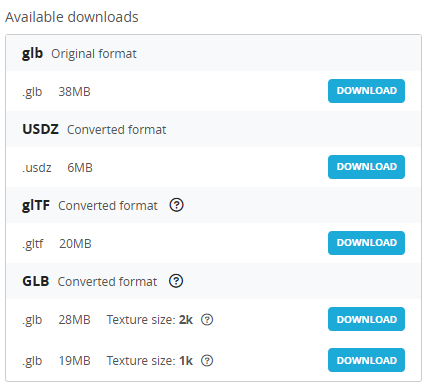
[링크 : https://openscad.org/]


// logo.scad - Basic example of module, top-level variable and $fn usage

Logo(50);

// The $fn parameter will influence all objects inside this module
// It can, optionally, be overridden when instantiating the module
module Logo(size=50, $fn=100) {
    // Temporary variables
    hole = size/2;
    cylinderHeight = size * 1.25;

    // One positive object (sphere) and three negative objects (cylinders)
    difference() {
        sphere(d=size);
        
        cylinder(d=hole, h=cylinderHeight, center=true);
        // The '#' operator highlights the object
        #rotate([90, 0, 0]) cylinder(d=hole, h=cylinderHeight, center=true);
        rotate([0, 90, 0]) cylinder(d=hole, h=cylinderHeight, center=true);
    }
}

echo(version=version());
// Written by Clifford Wolf <clifford@clifford.at> and Marius
// Kintel <marius@kintel.net>
//
// To the extent possible under law, the author(s) have dedicated all
// copyright and related and neighboring rights to this software to the
// public domain worldwide. This software is distributed without any
// warranty.
//
// You should have received a copy of the CC0 Public Domain
// Dedication along with this software.
// If not, see <http://creativecommons.org/publicdomain/zero/1.0/>.


주석 처리는 모르겠고 딱 봐서 sphere만 있으면 구를 그릴것 같아서 해보니 ok

오호.. 이래서 LLM 연동해서 그리기 쉽다고 하는 거였나?

Logo(50);

module Logo(size=50, $fn=100) {
    hole = size/2;
    cylinderHeight = size * 1.25;

    difference() {
        sphere(d=size);
    
    }
}

'프로그램 사용 > openSCAD' 카테고리의 다른 글

openSCAD + claude.ai = 파라메트릭 모델링  (0) 2026.07.13
openSCAD MCP  (0) 2026.06.20
pythonSCAD  (0) 2026.06.20
openSCAD cheatsheet  (0) 2026.06.20
openscad  (0) 2026.05.27
Posted by 구차니

최초 커밋으로 내려가니 그래도 조금만 손대서 돌아간다. 휴

$git checkout cfef9771
$ python main_stfpm.py --train --eval     --model_name mobilenet_v2     --categories bottle     --ad_layers 3 4 5     --boot_layer 2     --results_dirpath debug_outputs/metrics     --checkpoint_dir debug_outputs/checkpoints     --seeds 0 --epochs 1000 --input_size 224 224     --device cuda:1

[링크 : https://github.com/AMCO-UniPD/moviad]


아래 사진을 모니터에 띄우고


예제 클로드(무료)로 작성하라고 했는데

처음에는 모니터 없어서 안된다고(아니.. ssh -X로 해서 떠야 하는데?)

그래서 웹으로 뚝딱 만들어 줌.. 오.. 나보다 100배 낫네


cudnn 비활성화 하고 (빨간색 부분)

웹캠으로 노트북 모니터 비추도록 해서 테스트. 음.. 잘 되는건지 안되는건지 미묘하다

"""
MoViAD STFPM + 웹캠 실시간 이상 감지 (브라우저 스트리밍 버전)
=============================================================

cv2.imshow 없이 HTTP MJPEG 스트리밍으로 브라우저에서 확인합니다.
→  http://localhost:8080  에 접속하면 실시간 영상이 표시됩니다.

[사전 준비]
  cd moviad && pip install -e ./
  pip install opencv-python-headless torch torchvision

[모델 학습]
  python main_scripts/main_stfpm.py \
      --train \
      --model_name mobilenet_v2 \
      --ad_layers 4 7 10 \
      --categories bottle \
      --dataset_path /path/to/mvtec \
      --checkpoint_dir ./checkpoints/stfpm \
      --device cuda:0 \
      --epochs 100

[실행]
  python webcam_stfpm_anomaly.py \
      --checkpoint ./checkpoints/stfpm/bottle/mobilenet_v2_100ep_IMAGENET1K_V2_4_7_10_s0.pth.tar

[REST 제어 API]  (curl 또는 브라우저로 호출)
  GET /threshold/up      임계값 +0.02
  GET /threshold/down    임계값 -0.02
  GET /threshold/auto    자동 보정 (현재 점수 기준)
  GET /heatmap/toggle    히트맵 ON/OFF
  GET /reset             점수 히스토리 초기화
  GET /status            현재 상태 JSON
"""

import argparse
import sys
import time
import threading
import json
from datetime import datetime
from pathlib import Path
from http.server import HTTPServer, BaseHTTPRequestHandler
from io import BytesIO

import cv2
import numpy as np
import torch
from torchvision import transforms

torch.backends.cudnn.enabled = False
torch.backends.cudnn.benchmark = False

try:
    from moviad.models import Stfpm
except ImportError:
    sys.exit(
        "\n[ERROR] moviad 패키지를 찾을 수 없습니다.\n"
        "  moviad 레포 루트에서 'pip install -e ./' 를 실행하세요.\n"
    )

# ──────────────────────────────────────────────────────────────────
# 전역 공유 상태 (스레드 간 공유)
# ──────────────────────────────────────────────────────────────────
class AppState:
    def __init__(self):
        self.lock          = threading.Lock()
        self.jpeg_frame    = b""          # MJPEG 브라우저 전송용 프레임
        self.threshold     = 0.5
        self.show_heat     = True
        self.norm_score    = 0.0
        self.raw_score     = 0.0
        self.is_anomaly    = False
        self.fps           = 0.0
        self.score_hist: list[float] = []
        self.running       = True

STATE = AppState()

# ──────────────────────────────────────────────────────────────────
# 전처리
# ──────────────────────────────────────────────────────────────────
IMG_SIZE = 224
RESIZE   = 256

def make_preprocess(img_size=224):
    resize = int(img_size * 256 / 224)
    return transforms.Compose([
        transforms.ToPILImage(),
        transforms.Resize(resize),
        transforms.CenterCrop(img_size),
        transforms.ToTensor(),
        transforms.Normalize(mean=[0.485, 0.456, 0.406],
                             std =[0.229, 0.224, 0.225]),
    ])

# ──────────────────────────────────────────────────────────────────
# 모델 로드
# ──────────────────────────────────────────────────────────────────
def load_stfpm(checkpoint_path: str, device: torch.device) -> Stfpm:
    print(f"[INFO] 체크포인트 로드: {checkpoint_path}")
    state = torch.load(checkpoint_path, map_location=device)
    model = Stfpm()
    model.load_state_dict(state, strict=False)
    model.to(device)
    model.eval()
    print(f"[INFO] 백본={model.backbone_model_name}  "
          f"AD레이어={model.ad_layers}  입력크기={model.input_size}")
    return model

# ──────────────────────────────────────────────────────────────────
# 시각화 헬퍼
# ──────────────────────────────────────────────────────────────────
C_NORMAL  = (50,  205,  50)
C_ANOMALY = (30,   30, 220)
C_PANEL   = (15,   15,  15)

def score_to_heatmap(score_map: torch.Tensor, wh: tuple) -> np.ndarray:
    arr  = score_map.squeeze().cpu().numpy()
    arr  = cv2.normalize(arr, None, 0, 255, cv2.NORM_MINMAX).astype(np.uint8)
    heat = cv2.applyColorMap(arr, cv2.COLORMAP_JET)
    return cv2.resize(heat, wh)

def draw_ui(frame, norm_score, raw_score, threshold,
            is_anomaly, fps, heatmap, show_heat) -> np.ndarray:
    out = frame.copy()
    h, w = out.shape[:2]

    if show_heat and heatmap is not None:
        out = cv2.addWeighted(out, 0.5, heatmap, 0.5, 0)

    color = C_ANOMALY if is_anomaly else C_NORMAL
    cv2.rectangle(out, (0, 0), (w-1, h-1), color, 6)

    # 반투명 상단 패널
    panel_h = 100
    overlay = out.copy()
    cv2.rectangle(overlay, (0, 0), (w, panel_h), C_PANEL, -1)
    cv2.addWeighted(overlay, 0.70, out, 0.30, 0, out)

    label = "[ ANOMALY ]" if is_anomaly else "[  NORMAL  ]"
    cv2.putText(out, label, (10, 36),
                cv2.FONT_HERSHEY_DUPLEX, 1.1, color, 2, cv2.LINE_AA)

    info = (f"Score(norm): {norm_score:.4f}  Raw: {raw_score:.4f}  "
            f"Thr: {threshold:.4f}  FPS: {fps:.1f}")
    cv2.putText(out, info, (10, 64),
                cv2.FONT_HERSHEY_SIMPLEX, 0.52, (210, 210, 210), 1, cv2.LINE_AA)
    cv2.putText(out, "http://localhost:8080  |  /status /threshold/up /threshold/down /threshold/auto /heatmap/toggle /reset",
                (10, 88), cv2.FONT_HERSHEY_SIMPLEX, 0.38, (160, 160, 160), 1, cv2.LINE_AA)

    # 점수 바
    bx, by0, by1 = 12, 74, 88
    bw = w - 24
    fill = int(bw * min(norm_score, 1.0))
    tx   = bx + int(bw * min(threshold, 1.0))
    cv2.rectangle(out, (bx, by0), (bx+bw, by1), (55,55,55), -1)
    cv2.rectangle(out, (bx, by0), (bx+fill, by1), color, -1)
    cv2.line(out, (tx, by0-3), (tx, by1+3), (0, 255, 255), 2)

    return out

# ──────────────────────────────────────────────────────────────────
# 추론 스레드
# ──────────────────────────────────────────────────────────────────
def inference_loop(model, preprocess, device, camera_id, width, height):
    cap = cv2.VideoCapture(camera_id)
    if not cap.isOpened():
        print(f"[ERROR] 카메라(id={camera_id})를 열 수 없습니다.")
        STATE.running = False
        return

    cap.set(cv2.CAP_PROP_FRAME_WIDTH,  width)
    cap.set(cv2.CAP_PROP_FRAME_HEIGHT, height)

    t_prev = time.time()
    fps    = 0.0
    save_dir = Path("captures")

    print(f"[INFO] 카메라 시작 (id={camera_id}, {width}x{height})")
    print("[INFO] 브라우저에서  http://localhost:8080  접속하세요\n")

    while STATE.running:
        ret, frame = cap.read()
        if not ret:
            time.sleep(0.03)
            continue

        # 추론
        rgb    = cv2.cvtColor(frame, cv2.COLOR_BGR2RGB)
        tensor = preprocess(rgb).unsqueeze(0).to(device)

        with torch.no_grad():
            score_maps, anomaly_scores = model(tensor)

        raw_score = float(anomaly_scores[0].cpu())

        # 정규화 (min-max, 최근 500프레임)
        with STATE.lock:
            STATE.score_hist.append(raw_score)
            if len(STATE.score_hist) > 500:
                STATE.score_hist.pop(0)
            s_min = min(STATE.score_hist)
            s_max = max(STATE.score_hist)
            norm  = (raw_score - s_min) / (s_max - s_min + 1e-8)
            threshold  = STATE.threshold
            show_heat  = STATE.show_heat

        is_anomaly = norm > threshold

        heatmap = score_to_heatmap(score_maps, (frame.shape[1], frame.shape[0]))

        # FPS
        t_now = time.time()
        fps   = 0.9 * fps + 0.1 / max(t_now - t_prev, 1e-6)
        t_prev = t_now

        # 화면 렌더링
        display = draw_ui(frame, norm, raw_score, threshold,
                          is_anomaly, fps, heatmap, show_heat)

        # JPEG 인코딩 → 공유 버퍼
        ok, buf = cv2.imencode('.jpg', display, [cv2.IMWRITE_JPEG_QUALITY, 85])
        if ok:
            with STATE.lock:
                STATE.jpeg_frame = buf.tobytes()
                STATE.norm_score = norm
                STATE.raw_score  = raw_score
                STATE.is_anomaly = is_anomaly
                STATE.fps        = fps

        # 콘솔 출력
        tag = "ANOMALY ⚠" if is_anomaly else "normal ✓ "
        print(f"\r[{tag}]  norm={norm:.4f}  raw={raw_score:.4f}  "
              f"thr={threshold:.4f}  fps={fps:.1f}   ",
              end="", flush=True)

    cap.release()
    print("\n[INFO] 카메라 종료")

# ──────────────────────────────────────────────────────────────────
# HTTP 서버 (MJPEG + REST API)
# ──────────────────────────────────────────────────────────────────
HTML_PAGE = """\
<!DOCTYPE html>
<html>
<head>
  <meta charset="utf-8">
  <title>MoViAD STFPM - Bottle Anomaly Detection</title>
  <style>
    body {{ background:#111; color:#eee; font-family:monospace;
            display:flex; flex-direction:column; align-items:center; margin:0; padding:16px; }}
    h2   {{ color:#4fc3f7; margin:8px 0; }}
    img  {{ max-width:100%; border:3px solid #333; border-radius:6px; }}
    .controls {{ display:flex; gap:10px; flex-wrap:wrap; justify-content:center; margin:12px 0; }}
    button {{ padding:8px 18px; border:none; border-radius:5px; cursor:pointer;
              background:#1e88e5; color:#fff; font-size:14px; font-weight:bold; }}
    button:hover {{ background:#1565c0; }}
    button.danger {{ background:#e53935; }}
    button.success {{ background:#43a047; }}
    #status {{ background:#1e1e1e; border-radius:6px; padding:12px 20px;
               font-size:15px; min-width:340px; text-align:center; margin-top:6px; }}
    .normal  {{ color:#69f0ae; font-weight:bold; }}
    .anomaly {{ color:#ff5252; font-weight:bold; }}
  </style>
</head>
<body>
  <h2>🔍 MoViAD STFPM — Bottle Anomaly Detection</h2>
  <img src="/stream" alt="webcam stream">
  <div class="controls">
    <button onclick="api('/threshold/up')"  >Threshold ▲ (+0.02)</button>
    <button onclick="api('/threshold/down')">Threshold ▼ (−0.02)</button>
    <button class="success" onclick="api('/threshold/auto')">Auto Calibrate (t)</button>
    <button onclick="api('/heatmap/toggle')">Heatmap Toggle (h)</button>
    <button class="danger"  onclick="api('/reset')"          >Reset History (r)</button>
  </div>
  <div id="status">로딩 중...</div>
  <script>
    function api(path) {{
      fetch(path).then(r=>r.json()).then(updateStatus);
    }}
    function updateStatus(d) {{
      const cls = d.is_anomaly ? 'anomaly' : 'normal';
      const lab = d.is_anomaly ? '⚠ ANOMALY' : '✓ NORMAL';
      document.getElementById('status').innerHTML =
        `<span class="${{cls}}">${{lab}}</span> &nbsp;|&nbsp; `+
        `norm: <b>${{d.norm_score.toFixed(4)}}</b> &nbsp; `+
        `raw: ${{d.raw_score.toFixed(4)}} &nbsp; `+
        `thr: <b>${{d.threshold.toFixed(4)}}</b> &nbsp; `+
        `fps: ${{d.fps.toFixed(1)}} &nbsp; `+
        `heatmap: ${{d.show_heat ? 'ON' : 'OFF'}}`;
    }}
    setInterval(() => fetch('/status').then(r=>r.json()).then(updateStatus), 500);
  </script>
</body>
</html>
"""

class StreamHandler(BaseHTTPRequestHandler):
    def log_message(self, *args):
        pass  # 콘솔 노이즈 억제

    def do_GET(self):
        p = self.path.split('?')[0]

        # ── MJPEG 스트림 ─────────────────────────────
        if p == '/stream':
            self.send_response(200)
            self.send_header('Content-Type',
                             'multipart/x-mixed-replace; boundary=frame')
            self.end_headers()
            try:
                while STATE.running:
                    with STATE.lock:
                        frame = STATE.jpeg_frame
                    if frame:
                        self.wfile.write(
                            b"--frame\r\n"
                            b"Content-Type: image/jpeg\r\n\r\n"
                            + frame + b"\r\n"
                        )
                    time.sleep(0.03)
            except (BrokenPipeError, ConnectionResetError):
                pass
            return

        # ── REST API ──────────────────────────────────
        with STATE.lock:
            if p == '/threshold/up':
                STATE.threshold = min(STATE.threshold + 0.02, 0.99)
            elif p == '/threshold/down':
                STATE.threshold = max(STATE.threshold - 0.02, 0.01)
            elif p == '/threshold/auto':
                STATE.threshold = float(
                    np.clip(STATE.norm_score + 0.05, 0.01, 0.99)
                )
            elif p == '/heatmap/toggle':
                STATE.show_heat = not STATE.show_heat
            elif p == '/reset':
                STATE.score_hist.clear()

            resp = {
                "threshold" : STATE.threshold,
                "norm_score": STATE.norm_score,
                "raw_score" : STATE.raw_score,
                "is_anomaly": STATE.is_anomaly,
                "fps"       : STATE.fps,
                "show_heat" : STATE.show_heat,
            }

        # ── HTML 홈 ───────────────────────────────────
        if p == '/':
            body = HTML_PAGE.encode()
            self.send_response(200)
            self.send_header('Content-Type', 'text/html; charset=utf-8')
            self.send_header('Content-Length', str(len(body)))
            self.end_headers()
            self.wfile.write(body)
            return

        body = json.dumps(resp).encode()
        self.send_response(200)
        self.send_header('Content-Type', 'application/json')
        self.send_header('Content-Length', str(len(body)))
        self.end_headers()
        self.wfile.write(body)

# ──────────────────────────────────────────────────────────────────
# 메인
# ──────────────────────────────────────────────────────────────────
def run(args):
    # 디바이스
    dev_str = args.device
    if "cuda" in dev_str and not torch.cuda.is_available():
        print("[WARN] CUDA 불가 — CPU로 전환합니다.")
        dev_str = "cpu"
    device = torch.device(dev_str)

    # 모델 로드
    model = load_stfpm(args.checkpoint, device)

    # 입력 크기 동기화
    img_size = model.input_size[0] if model.input_size else 224
    preprocess = make_preprocess(img_size)

    STATE.threshold = args.threshold

    # 추론 스레드 시작
    t = threading.Thread(
        target=inference_loop,
        args=(model, preprocess, device,
              args.camera_id, args.width, args.height),
        daemon=True,
    )
    t.start()

    # HTTP 서버 시작
    server = HTTPServer(("0.0.0.0", args.port), StreamHandler)
    print(f"[INFO] HTTP 서버 시작: http://localhost:{args.port}")
    print("[INFO] Ctrl+C 로 종료\n")
    try:
        server.serve_forever()
    except KeyboardInterrupt:
        print("\n[INFO] 서버 종료")
    finally:
        STATE.running = False
        server.server_close()

# ──────────────────────────────────────────────────────────────────
# CLI
# ──────────────────────────────────────────────────────────────────
def parse_args():
    p = argparse.ArgumentParser(
        description="MoViAD STFPM bottle — 웹캠 이상 감지 (브라우저 스트리밍)"
    )
    p.add_argument("--checkpoint", type=str, required=True,
                   help=".pth.tar 체크포인트 경로")
    p.add_argument("--camera_id",  type=int,   default=0)
    p.add_argument("--device",     type=str,   default="cuda:0")
    p.add_argument("--threshold",  type=float, default=0.5)
    p.add_argument("--width",      type=int,   default=640)
    p.add_argument("--height",     type=int,   default=480)
    p.add_argument("--port",       type=int,   default=8080)
    return p.parse_args()

if __name__ == "__main__":
    run(parse_args())

'프로그램 사용 > yolo_tensorflow' 카테고리의 다른 글

moviad / 딥러닝 학습율  (0) 2026.06.25
moviad ssd-mobilenetv2 on imx8mp  (0) 2026.06.24
moviad stfpm  (0) 2026.06.18
ubuntu 26.04 + 3070 + tensorflow + python 3.14 + docker...  (0) 2026.06.17
STFPM 실행  (0) 2026.06.01
Posted by 구차니

하.. 갈길이 멀다 ㅠㅠ

patchcore는 cudnn만 꺼주면 어떻게 되는데

stfpm은 소스가 문제라 .. -_-

~/src/moviad/main_scripts$ python3 main_stfpm.py --train --eval     --model_name mobilenet_v2     --categories bottle     --ad_layers 3 4 5     --boot_layer 2     --results_dirpath debug_outputs/metrics     --checkpoint_dir debug_outputs/checkpoints     --seeds 0 --epochs 3 --input_size 224 224     --device cuda:0
ERROR:root:micromind not found in current environment
Traceback (most recent call last):
  File "/home/falinux/src/moviad/main_scripts/main_stfpm.py", line 12, in <module>
    from moviad.trainers.trainer_stfpm import train_param_grid_search
ImportError: cannot import name 'train_param_grid_search' from 'moviad.trainers.trainer_stfpm' (/home/falinux/src/moviad/moviad/trainers/trainer_stfpm.py)


$ git log
commit 5d547292f3e1e4402b91d2950b884be74a37900f (HEAD -> main, origin/main, origin/HEAD)
Author: FrancescoBorsatti <francesco.borsatti.1@phd.unipd.it>
Date:   Mon Apr 13 18:16:40 2026 +0200

    update readme


괜히 verified가 붙은게 아닌듯. 저 버전으로는 내려가야 한다. merge 하다가 꼬인듯.

[링크 : https://github.com/AMCO-UniPD/moviad/blob/5bf4b63a89a860ab3d76679fffe35ee50225901d/moviad/trainers/trainer_stfpm.py] 없음

[링크 : https://github.com/AMCO-UniPD/moviad/blob/ec89d3e145615c9c1fbae69480f7da2eb4f9c606/moviad/trainers/trainer_stfpm.py] 있음(verified)

[링크 : https://github.com/AMCO-UniPD/moviad/blob/a209ec364aba6f5f33be010af948a578af4971ce/moviad/trainers/trainer_stfpm.py] 있음


+

아래 커밋으로 이동해버리고(!)

git checkout ec89d3e145615c9c1fbae69480f7da2eb4f9c606


실행하면 안된다!

정해진 경로에 넣으란거지? -_-+

~/src/moviad/main_scripts$ python3 main_stfpm.py --train --eval     --model_name mobilenet_v2     --categories bottle     --ad_layers 3 4 5     --boot_layer 2     --results_dirpath debug_outputs/metrics     --checkpoint_dir debug_outputs/checkpoints     --seeds 0 --epochs 3 --input_size 224 224     --device cuda:0
ERROR:root:micromind not found in current environment
Training with params: {'dataset_path': '../../datasets/mvtec/', 'categories': ['bottle'], 'ad_layers': [[3, 4, 5]], 'epochs': [3], 'seeds': [0], 'batch_size': 64, 'backbone_model_name': 'mobilenet_v2', 'device': device(type='cuda', index=0), 'img_input_size': [224, 224], 'img_output_size': (224, 224), 'early_stopping': None, 'student_bootstrap_layer': [2], 'checkpoint_dir': 'debug_outputs/checkpoints', 'normalize_dataset': True, 'log_dirpath': None, 'contamination_ratio': None, 'test_dataset': False}
TRAIN | cat: bottle, ad_layers: [3, 4, 5], epochs: 3, seed: 0, early_stopping: None, bootstrap: 2
Traceback (most recent call last):
  File "/home/minimonk/src/moviad/main_scripts/main_stfpm.py", line 405, in <module>
    raise e
  File "/home/minimonk/src/moviad/main_scripts/main_stfpm.py", line 387, in <module>
    main(args)
  File "/home/minimonk/src/moviad/main_scripts/main_stfpm.py", line 86, in main
    trained_models_filepaths = train_param_grid_search(params)
  File "/home/minimonk/src/moviad/moviad/trainers/trainer_stfpm.py", line 321, in train_param_grid_search
    log, snapshot_path = train_param_grid_step(
  File "/home/minimonk/src/moviad/moviad/trainers/trainer_stfpm.py", line 209, in train_param_grid_step
    train_dataset.load_dataset()
  File "/home/minimonk/src/moviad/moviad/datasets/mvtec/mvtec_dataset.py", line 175, in load_dataset
    raise RuntimeError(msg)
RuntimeError: Found 0 images in ../../datasets/mvtec/bottle
Posted by 구차니

개발환경 구축하려고 이것저것 보고 있는데

구형 모델을 쓰려고 하다보니(ssd mobilenet v3) 영 환경 잡는것 자체가 쉽지 않아 보인다.


[링크 : https://www.tensorflow.org/install/docker?hl=ko] 텐서플로우 docker

[링크 : https://github.com/NVIDIA/nvidia-docker] 요건 deprecated

[링크 : https://github.com/NVIDIA/nvidia-container-toolkit] 요걸 쓰라고


tensorflow 2.21.0

2026.03.07 release

지원 파이썬 버전 3.13 최대.

[링크 : https://pypi.org/project/tensorflow/]


tensorflow-gpu 2.12.0

2023.01.25 release

[링크 : https://pypi.org/project/tensorflow-gpu/]


그 와중에 우분투 26.04 의 파이썬 버전이 3.14 대이고

$ python3 --version
Python 3.14.4


텐서플로우는 지원버전이 없다고 배째고

$ pip3 install tensorflow
ERROR: Could not find a version that satisfies the requirement tensorflow (from versions: none)
ERROR: No matching distribution found for tensorflow


난 어짜피 gpu 가속받을거니까~ 하고 실행하는데 에러

$ pip3 install tensorflow-gpu
Collecting tensorflow-gpu
  Using cached tensorflow-gpu-2.12.0.tar.gz (2.6 kB)
  Installing build dependencies ... done
  Getting requirements to build wheel ... error
  error: subprocess-exited-with-error
  
  × Getting requirements to build wheel did not run successfully.
  │ exit code: 1
  ╰─> [77 lines of output]
      Traceback (most recent call last):
        File "/tmp/pip-build-env-kb1b92jj/overlay/lib/python3.14/site-packages/setuptools/_vendor/packaging/requirements.py", line 36, in __init__
          parsed = _parse_requirement(requirement_string)
        File "/tmp/pip-build-env-kb1b92jj/overlay/lib/python3.14/site-packages/setuptools/_vendor/packaging/_parser.py", line 71, in parse_requirement
          return _parse_requirement(Tokenizer(source, rules=DEFAULT_RULES))
        File "/tmp/pip-build-env-kb1b92jj/overlay/lib/python3.14/site-packages/setuptools/_vendor/packaging/_parser.py", line 89, in _parse_requirement
          url, specifier, marker = _parse_requirement_details(tokenizer)
                                   ~~~~~~~~~~~~~~~~~~~~~~~~~~^^^^^^^^^^^
        File "/tmp/pip-build-env-kb1b92jj/overlay/lib/python3.14/site-packages/setuptools/_vendor/packaging/_parser.py", line 135, in _parse_requirement_details
          marker = _parse_requirement_marker(
              tokenizer,
          ...<5 lines>...
              ),
          )
        File "/tmp/pip-build-env-kb1b92jj/overlay/lib/python3.14/site-packages/setuptools/_vendor/packaging/_parser.py", line 156, in _parse_requirement_marker
          tokenizer.raise_syntax_error(
          ~~~~~~~~~~~~~~~~~~~~~~~~~~~~^
              f"Expected {expected} or end",
              ^^^^^^^^^^^^^^^^^^^^^^^^^^^^^^
              span_start=span_start,
              ^^^^^^^^^^^^^^^^^^^^^^
              span_end=None,
              ^^^^^^^^^^^^^^
          )
          ^
        File "/tmp/pip-build-env-kb1b92jj/overlay/lib/python3.14/site-packages/setuptools/_vendor/packaging/_tokenizer.py", line 166, in raise_syntax_error
          raise ParserSyntaxError(
          ...<3 lines>...
          )
      packaging._tokenizer.ParserSyntaxError: Expected semicolon (after name with no version specifier) or end
          python_version>"3.7"
                        ^
      
      The above exception was the direct cause of the following exception:
      
      Traceback (most recent call last):
        File "/home/minimonk/venv/lib/python3.14/site-packages/pip/_vendor/pyproject_hooks/_in_process/_in_process.py", line 389, in <module>
          main()
          ~~~~^^
        File "/home/minimonk/venv/lib/python3.14/site-packages/pip/_vendor/pyproject_hooks/_in_process/_in_process.py", line 373, in main
          json_out["return_val"] = hook(**hook_input["kwargs"])
                                   ~~~~^^^^^^^^^^^^^^^^^^^^^^^^
        File "/home/minimonk/venv/lib/python3.14/site-packages/pip/_vendor/pyproject_hooks/_in_process/_in_process.py", line 143, in get_requires_for_build_wheel
          return hook(config_settings)
        File "/tmp/pip-build-env-kb1b92jj/overlay/lib/python3.14/site-packages/setuptools/build_meta.py", line 333, in get_requires_for_build_wheel
          return self._get_build_requires(config_settings, requirements=[])
                 ~~~~~~~~~~~~~~~~~~~~~~~~^^^^^^^^^^^^^^^^^^^^^^^^^^^^^^^^^^
        File "/tmp/pip-build-env-kb1b92jj/overlay/lib/python3.14/site-packages/setuptools/build_meta.py", line 301, in _get_build_requires
          self.run_setup()
          ~~~~~~~~~~~~~~^^
        File "/tmp/pip-build-env-kb1b92jj/overlay/lib/python3.14/site-packages/setuptools/build_meta.py", line 520, in run_setup
          super().run_setup(setup_script=setup_script)
          ~~~~~~~~~~~~~~~~~^^^^^^^^^^^^^^^^^^^^^^^^^^^
        File "/tmp/pip-build-env-kb1b92jj/overlay/lib/python3.14/site-packages/setuptools/build_meta.py", line 317, in run_setup
          exec(code, locals())
          ~~~~^^^^^^^^^^^^^^^^
        File "<string>", line 40, in <module>
        File "/tmp/pip-build-env-kb1b92jj/overlay/lib/python3.14/site-packages/setuptools/__init__.py", line 114, in setup
          _install_setup_requires(attrs)
          ~~~~~~~~~~~~~~~~~~~~~~~^^^^^^^
        File "/tmp/pip-build-env-kb1b92jj/overlay/lib/python3.14/site-packages/setuptools/__init__.py", line 85, in _install_setup_requires
          dist.parse_config_files(ignore_option_errors=True)
          ~~~~~~~~~~~~~~~~~~~~~~~^^^^^^^^^^^^^^^^^^^^^^^^^^^
        File "/tmp/pip-build-env-kb1b92jj/overlay/lib/python3.14/site-packages/setuptools/dist.py", line 764, in parse_config_files
          self._finalize_requires()
          ~~~~~~~~~~~~~~~~~~~~~~~^^
        File "/tmp/pip-build-env-kb1b92jj/overlay/lib/python3.14/site-packages/setuptools/dist.py", line 382, in _finalize_requires
          self._normalize_requires()
          ~~~~~~~~~~~~~~~~~~~~~~~~^^
        File "/tmp/pip-build-env-kb1b92jj/overlay/lib/python3.14/site-packages/setuptools/dist.py", line 400, in _normalize_requires
          self.install_requires = list_(map(str, _reqs.parse(install_requires)))
                                  ~~~~~^^^^^^^^^^^^^^^^^^^^^^^^^^^^^^^^^^^^^^^^^
        File "/tmp/pip-build-env-kb1b92jj/overlay/lib/python3.14/site-packages/setuptools/_vendor/packaging/requirements.py", line 38, in __init__
          raise InvalidRequirement(str(e)) from e
      packaging.requirements.InvalidRequirement: Expected semicolon (after name with no version specifier) or end
          python_version>"3.7"
                        ^
      [end of output]
  
  note: This error originates from a subprocess, and is likely not a problem with pip.
error: subprocess-exited-with-error

× Getting requirements to build wheel did not run successfully.
│ exit code: 1
╰─> See above for output.

note: This error originates from a subprocess, and is likely not a problem with pip.


tensorflow 도 이제 인기가 없어졌다고 해야하나.. 지는 해가 되어버렸나 보다.

[링크 : https://github.com/tensorflow/tensorflow/issues/102890]


짧고 명확하다... deprecation. 후..

TensorFlow Object Detection API
TensorFlow 2.2 TensorFlow 1.15 Python 3.6

Deprecation

[링크 : https://github.com/tensorflow/models/blob/master/research/object_detection/README.md]


keras도 희망이 없고, pytorch도 좋은소리 안나오고 어떻게 해야하나..

by GPT


by claude

'프로그램 사용 > yolo_tensorflow' 카테고리의 다른 글

moviad / stftpm / 1080 ti / webcam feat claude  (0) 2026.06.19
moviad stfpm  (0) 2026.06.18
STFPM 실행  (0) 2026.06.01
딥러닝 학습 관련(epoch, loss)  (0) 2026.05.27
NAS - Neural Architecture Search  (0) 2026.05.21
Posted by 구차니
프로그램 사용/gcc2026. 6. 10. 12:06

msvc의 md 옵션과는 의미가 다르고(claude에게 낚임!)

그냥 빌드시 디버깅용 플래그라고 해야하나..?

동적 링크시 어떤 파일을 참조하는지 .d 파일에 주로 쓰도록 하는 것 같다.

[링크 : https://dmake.tistory.com/26]

[링크 : https://m.blog.naver.com/wonmylover/220771036728]


-M
Instead of outputting the result of preprocessing, output a rule suitable for make describing the dependencies of the main source file. The preprocessor outputs one make rule containing the object file name for that source file, a colon, and the names of all the included files, including those coming from -include or -imacros command line options.

Unless specified explicitly (with -MT or -MQ), the object file name consists of the name of the source file with any suffix replaced with object file suffix and with any leading directory parts removed. If there are many included files then the rule is split into several lines using \-newline. The rule has no commands.
This option does not suppress the preprocessor's debug output, such as -dM. To avoid mixing such debug output with the dependency rules you should explicitly specify the dependency output file with -MF, or use an environment variable like DEPENDENCIES_OUTPUT . Debug output will still be sent to the regular output stream as normal.

Passing -M to the driver implies -E, and suppresses warnings with an implicit -w.

-MM
Like -M but do not mention header files that are found in system header directories, nor header files that are included, directly or indirectly, from such a header.

This implies that the choice of angle brackets or double quotes in an #include directive does not in itself determine whether that header will appear in -MM dependency output. This is a slight change in semantics from GCC versions 3.0 and earlier.
-MF file
When used with -M or -MM, specifies a file to write the dependencies to. If no -MF switch is given the preprocessor sends the rules to the same place it would have sent preprocessed output.
When used with the driver options -MD or -MMD, -MF overrides the default dependency output file.

-MG
In conjunction with an option such as -M requesting dependency generation, -MG assumes missing header files are generated files and adds them to the dependency list without raising an error. The dependency filename is taken directly from the "#include" directive without prepending any path. -MG also suppresses preprocessed output, as a missing header file renders this useless.

This feature is used in automatic updating of makefiles.
-MP
This option instructs CPP to add a phony target for each dependency other than the main file, causing each to depend on nothing. These dummy rules work around errors make gives if you remove header files without updating the Makefile to match.

This is typical output:
test.o: test.c test.h

test.h:
-MT target
Change the target of the rule emitted by dependency generation. By default CPP takes the name of the main input file, deletes any directory components and any file suffix such as .c, and appends the platform's usual object suffix. The result is the target.
An -MT option will set the target to be exactly the string you specify. If you want multiple targets, you can specify them as a single argument to -MT, or use multiple -MT options.

For example, -MT '$(objpfx)foo.o' might give

$(objpfx)foo.o: foo.c
-MQ target
Same as -MT, but it quotes any characters which are special to Make. -MQ '$(objpfx)foo.o' gives
$$(objpfx)foo.o: foo.c
The default target is automatically quoted, as if it were given with -MQ.
-MD
-MD is equivalent to -M -MF file, except that -E is not implied. The driver determines file based on whether an -o option is given. If it is, the driver uses its argument but with a suffix of .d, otherwise it takes the name of the input file, removes any directory components and suffix, and applies a .d suffix.

If -MD is used in conjunction with -E, any -o switch is understood to specify the dependency output file, but if used without -E, each -o is understood to specify a target object file.
Since -E is not implied, -MD can be used to generate a dependency output file as a side-effect of the compilation process.

-MMD
Like -MD except mention only user header files, not system header files.

[링크 : https://linux.die.net/man/1/gcc]

Posted by 구차니
프로그램 사용/gcc2026. 6. 10. 11:57

리눅스에서 gcc로 빌드하면 시스템 절대 경로라고 해야하나.

아래의 경우, /lib/x86_64-linux-gnu/ 의 경로에 있는 so들을 보도록 되어있는데 (LD_LIBRARY_PATH)

이걸 빌드 시에 위치 기준 상대 경로를 보게 하는 옵션 인듯.

so 파일과 실행파일을 같이 배포할때 쓰이려나?


$ ldd untitled
linux-vdso.so.1 (0x00007fff3f7a7000)
libQt5Widgets.so.5 => /lib/x86_64-linux-gnu/libQt5Widgets.so.5 (0x00007a58ffe00000)
libQt5Gui.so.5 => /lib/x86_64-linux-gnu/libQt5Gui.so.5 (0x00007a58ff600000)
libQt5Core.so.5 => /lib/x86_64-linux-gnu/libQt5Core.so.5 (0x00007a58ff000000)
libstdc++.so.6 => /lib/x86_64-linux-gnu/libstdc++.so.6 (0x00007a58fec00000)
libgcc_s.so.1 => /lib/x86_64-linux-gnu/libgcc_s.so.1 (0x00007a5900f63000)
libc.so.6 => /lib/x86_64-linux-gnu/libc.so.6 (0x00007a58fe800000)
libm.so.6 => /lib/x86_64-linux-gnu/libm.so.6 (0x00007a5900519000)
libGL.so.1 => /lib/x86_64-linux-gnu/libGL.so.1 (0x00007a58ffd79000)
libpng16.so.16 => /lib/x86_64-linux-gnu/libpng16.so.16 (0x00007a59004de000)
libz.so.1 => /lib/x86_64-linux-gnu/libz.so.1 (0x00007a5900f45000)
libharfbuzz.so.0 => /lib/x86_64-linux-gnu/libharfbuzz.so.0 (0x00007a58fef31000)
libmd4c.so.0 => /lib/x86_64-linux-gnu/libmd4c.so.0 (0x00007a59004cc000)
libdouble-conversion.so.3 => /lib/x86_64-linux-gnu/libdouble-conversion.so.3 (0x00007a58ffd64000)
libicui18n.so.70 => /lib/x86_64-linux-gnu/libicui18n.so.70 (0x00007a58fe400000)
libicuuc.so.70 => /lib/x86_64-linux-gnu/libicuuc.so.70 (0x00007a58fe205000)
libpcre2-16.so.0 => /lib/x86_64-linux-gnu/libpcre2-16.so.0 (0x00007a58ff576000)
libzstd.so.1 => /lib/x86_64-linux-gnu/libzstd.so.1 (0x00007a58fee62000)
libglib-2.0.so.0 => /lib/x86_64-linux-gnu/libglib-2.0.so.0 (0x00007a58feac5000)
/lib64/ld-linux-x86-64.so.2 (0x00007a5900faa000)
libGLdispatch.so.0 => /lib/x86_64-linux-gnu/libGLdispatch.so.0 (0x00007a58fe747000)
libGLX.so.0 => /lib/x86_64-linux-gnu/libGLX.so.0 (0x00007a58ffd30000)
libfreetype.so.6 => /lib/x86_64-linux-gnu/libfreetype.so.6 (0x00007a58fe13d000)
libgraphite2.so.3 => /lib/x86_64-linux-gnu/libgraphite2.so.3 (0x00007a58ffd09000)
libicudata.so.70 => /lib/x86_64-linux-gnu/libicudata.so.70 (0x00007a58fc400000)
libpcre.so.3 => /lib/x86_64-linux-gnu/libpcre.so.3 (0x00007a58fea4f000)
libX11.so.6 => /lib/x86_64-linux-gnu/libX11.so.6 (0x00007a58fc2c0000)
libbrotlidec.so.1 => /lib/x86_64-linux-gnu/libbrotlidec.so.1 (0x00007a58ffcfb000)
libxcb.so.1 => /lib/x86_64-linux-gnu/libxcb.so.1 (0x00007a58fee38000)
libbrotlicommon.so.1 => /lib/x86_64-linux-gnu/libbrotlicommon.so.1 (0x00007a58fea2c000)
libXau.so.6 => /lib/x86_64-linux-gnu/libXau.so.6 (0x00007a5900f37000)
libXdmcp.so.6 => /lib/x86_64-linux-gnu/libXdmcp.so.6 (0x00007a59004c4000)
libbsd.so.0 => /lib/x86_64-linux-gnu/libbsd.so.0 (0x00007a58ffce3000)
libmd.so.0 => /lib/x86_64-linux-gnu/libmd.so.0 (0x00007a58ff569000)


[링크 : https://velog.io/@wjddms206/RPATH-한번에-이해하기]

[링크 : https://stackoverflow.com/questions/6324131/rpath-origin-not-having-desired-effect]

[링크 : https://stackoverflow.com/questions/38058041/correct-usage-of-rpath-relative-vs-absolute]

[링크 : https://stackoverflow.com/questions/38058041/correct-usage-of-rpath-relative-vs-absolute]

Posted by 구차니

언제나 그렇듯(!) 1080은 돌리기 힘든 시대구만.. 저번에 찾아둔 걸로 버전 맞추고

pip3 uninstall -y torch torchvision torchaudio xformers
pip3 install torch==2.6.0 torchvision torchaudio --index-url https://download.pytorch.org/whl/cu118
pip3 install xformers==0.0.29.post2


-mvtec-ad 는 dataset 다운로드 받아 압축푼 최상위 디렉토리를 지정해주면 된다.

~/src/STFPM/mvtec-ad$ tree -d -L 2
.
├── bottle
│   ├── ground_truth
│   ├── test
│   └── train
├── cable
│   ├── ground_truth
│   ├── test
│   └── train
├── capsule
│   ├── ground_truth
│   ├── test
│   └── train
├── carpet
│   ├── ground_truth
│   ├── test
│   └── train
├── grid
│   ├── ground_truth
│   ├── test
│   └── train
├── hazelnut
│   ├── ground_truth
│   ├── test
│   └── train
├── leather
│   ├── ground_truth
│   ├── test
│   └── train
├── metal_nut
│   ├── ground_truth
│   ├── test
│   └── train
├── pill
│   ├── ground_truth
│   ├── test
│   └── train
├── screw
│   ├── ground_truth
│   ├── test
│   └── train
├── tile
│   ├── ground_truth
│   ├── test
│   └── train
├── toothbrush
│   ├── ground_truth
│   ├── test
│   └── train
├── transistor
│   ├── ground_truth
│   ├── test
│   └── train
├── wood
│   ├── ground_truth
│   ├── test
│   └── train
└── zipper
    ├── ground_truth
    ├── test
    └── train


$ python3 main.py train --mvtec-ad  mvtec-ad --category carpet --epochs 200
...
[198/200] loss: 0.145916
[198/200] loss: 0.147569
[198/200] loss: 0.147157
[198/200] loss: 0.146806
[198/200] loss: 0.147341
[198/200] loss: 0.145462
[198/200] loss: 0.144424
Valid Loss: 0.0001142
[199/200] loss: 0.146722
[199/200] loss: 0.146246
[199/200] loss: 0.145853
[199/200] loss: 0.145966
[199/200] loss: 0.145793
[199/200] loss: 0.145863
[199/200] loss: 0.154857
Valid Loss: 0.0001460

real 9m35.951s
user 31m24.301s
sys 1m16.579s


loss 만 보고 학습을 하게 했네. 

그래도 200 epoch 인데 내부는 어떤지 모르겠지만 10분 컷이면 양호하네


cpu 로 1개 코어만 사용해서 하는데 제법 걸린다. 이미지로 판별하고 출력할 수 없나?

$ time python3 main.py test --mvtec-ad  mvtec-ad --category carpet --checkpoint snapshots/carpet/best.pth.tar
load snapshots/carpet/best.pth.tar
Catergory: carpet Pixel-AUC: 0.990288 Image-AUC: 0.955859 PRO: 0.959637

real 5m39.944s
user 5m46.592s
sys 0m1.064s


tar 라면서 왜 zip 이래?!?

~/src/STFPM/snapshots/carpet$ file *
best.pth.tar: Zip archive data, at least v0.0 to extract, compression method=store

~/src/STFPM/snapshots/carpet$ ll -h
total 43M
drwxrwxr-x 2 falinux falinux 4.0K  6월  1 11:57 ./
drwxrwxr-x 3 falinux falinux 4.0K  6월  1 11:14 ../
-rw-rw-r-- 1 falinux falinux  43M  6월  1 11:52 best.pth.tar


[링크 : https://github.com/gdwang08/STFPM]

'프로그램 사용 > yolo_tensorflow' 카테고리의 다른 글

moviad stfpm  (0) 2026.06.18
ubuntu 26.04 + 3070 + tensorflow + python 3.14 + docker...  (0) 2026.06.17
딥러닝 학습 관련(epoch, loss)  (0) 2026.05.27
NAS - Neural Architecture Search  (0) 2026.05.21
MCUNet  (0) 2026.05.21
Posted by 구차니
프로그램 사용/Blender2026. 5. 27. 23:53

먼가 발견하긴 했는데, 이미 서비스 종료 -_ㅠ


Notice: The model used in the paper, Claude Sonnet 3.7, has been retired. As a result, we have discontinued the LL3M server.

[링크 : https://github.com/threedle/ll3m]

[링크 : https://threedle.github.io/ll3m/]


'프로그램 사용 > Blender' 카테고리의 다른 글

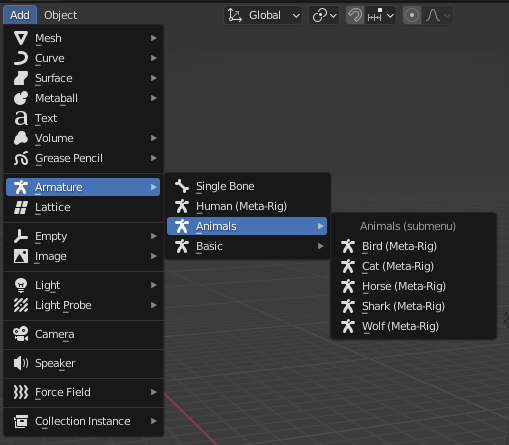
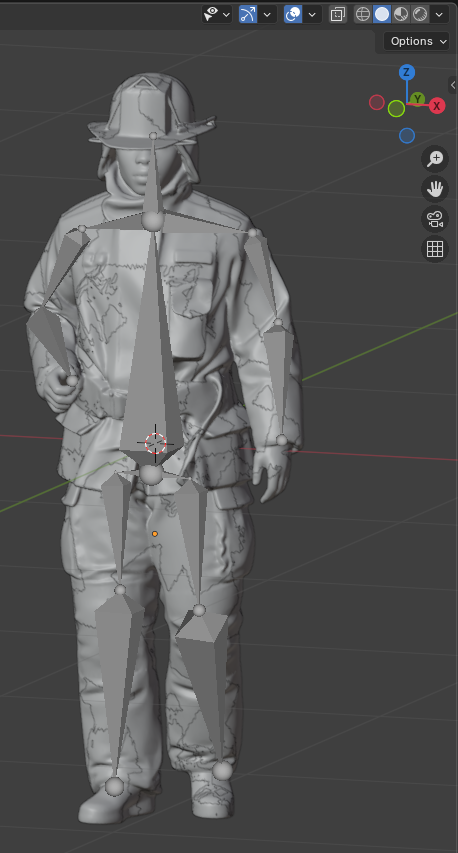
blender bone (armature)  (0) 2026.06.24
3d model 다운로드 / blender import  (0) 2026.06.24
gemini + blender  (0) 2025.09.01
blender로 stl 구멍 메우기  (0) 2025.08.20
blender 휠 에뮬레이트 하기  (0) 2025.05.18
Posted by 구차니

freecad나 blender cad 확장으로는 이래저래 힘들고

python 통해서 제어하면 이상하게 나와서 제어가 유리한 무언가를 찾는 중


[링크 : https://github.com/fogleman/sdf]


[링크 : https://news.hada.io/topic?id=25230]

'프로그램 사용 > openSCAD' 카테고리의 다른 글

openSCAD + claude.ai = 파라메트릭 모델링  (0) 2026.07.13
openSCAD MCP  (0) 2026.06.20
pythonSCAD  (0) 2026.06.20
openSCAD cheatsheet  (0) 2026.06.20
openSCAD 설치  (0) 2026.06.20
Posted by 구차니


-----

metric 함수. 얘도 함수였구나.

아무튼 metric은 격하게 오락가락 하고

[링크 : https://modulabs.co.kr/blog/loss-versus-accuracy]


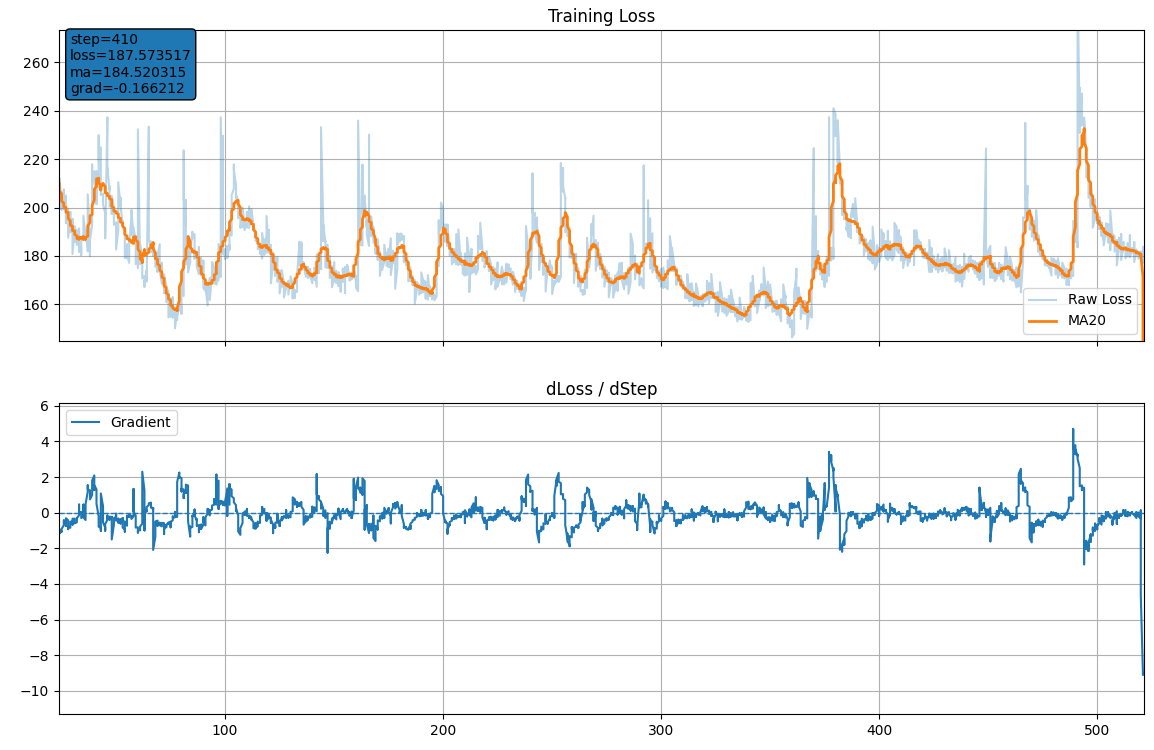
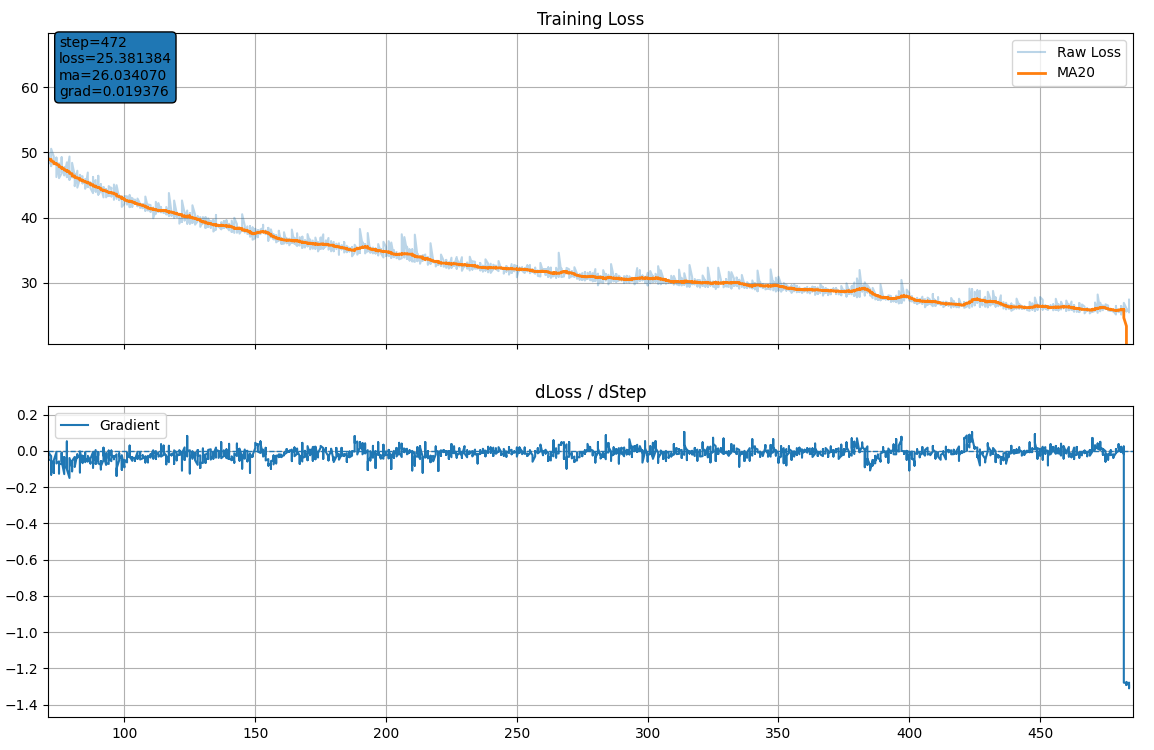
loss 가 점진적 감소 -> 잘 학습

loss 급격히 감소 후 유지 -> 정상

loss 일정 시점 이후 증가 -> over fitting

[링크 : https://m.blog.naver.com/datapreprep/223748771141]


근데.. underfitting은 먼지 감이 안오네.

When to change the number of epochs (training cycles)

Selecting the appropriate number of epochs is a balance between underfitting and overfitting.

Underfitting: One of the most straightforward indicators of underfitting is if the model performs poorly on the training data. This can be observed in Edge Impulse Studio through metrics such as accuracy, or loss, depending on the type of problem (classification or regression). If these metrics indicate poor performance, it suggests that the model has not learned the patterns of the data well. In that case, increasing the number of epochs can improve your model performance. Please note that other solutions exist such as increasing your neural network architecture complexity, changing the preprocessing technique or reducing regularization.

Overfitting: Detecting overfitting involves recognizing when the model has learned too much from the training data, including its noise and outliers, to the detriment of its performance on new, unseen data. Overfitting is characterized by the model performing exceptionally well on the training data but poorly on the validation or test data. Evaluating overfitting can be achieved by comparing the performance of the model between the training set and the validation set during training. When the performance on the validation set starts to degrade, it might indicate that the model is beginning to overfit the training data. In that case, decreasing the number of epochs can improve your model performance. As with underfitting, other solutions exist to reduce overfitting such as increasing the number of training data, adding regularization techniques to add penalties on large weights, adding dropout layers, simplifying the model architecture and even using early stopping.


[링크 : https://docs.edgeimpulse.com/knowledge/concepts/machine-learning/neural-networks/epochs]


overfitting 중인 loss 값 이라는데, 


학습셋이 너무 적을 경우 overfitting이 빠르게 발생하는 것으로 보인다.

그나저나 저 130 miliion parameter는 ssd300 에서 어떻게 산출된걸까?

What you are experiencing is called overfitting and it happens because of your very small dataset.
All the model cares about is performance on the training dataset, so given the opportunity, it will simply attempt to memorize it. This is what happens in you case, you feed a model which contains over 130 Million parameters less than 319 images.
So regarding your questions:
  1. The loss function shows a clear case of overfitting.
  2. On general, it is okay to use a trained model, especially when you only have a small dataset, but in your case, the dataset is too small for any deep-learning model. When I say small dataset, I mean 10k images, not several hundreds.
  3. You should not train for longer time, once the validation loss stops improving, it is a clear sign to stop. There is even a training technique named "early stopping" which is designed to stop training once the validation loss stops to drop.
You have to understand that currently, your dataset of 300 images, is irrelevant to the world of deep-learning. So if you still want to use it for object detection, you need to revert to more classic computer-vision techniques like using HOG or SIFT features, or even manually engineering the features for your special case.
 

[링크 : https://datascience.stackexchange.com/questions/46456/issues-with-training-ssd-on-own-dataset]


The SSD300 has 35.6 million parameters, while the SSDlite320 has about a tenth of them, i.e., 3.4 million.

[링크 : https://www.mdpi.com/2673-6470/3/3/12]

'프로그램 사용 > yolo_tensorflow' 카테고리의 다른 글

ubuntu 26.04 + 3070 + tensorflow + python 3.14 + docker...  (0) 2026.06.17
STFPM 실행  (0) 2026.06.01
NAS - Neural Architecture Search  (0) 2026.05.21
MCUNet  (0) 2026.05.21
STFPM - Student-Teacher Feature Pyramid Matching  (0) 2026.05.20
Posted by 구차니