'프로그램 사용'에 해당되는 글 2519건

  1. 2026.05.19 octave - pkg load image
  2. 2026.05.14 U-net, segmentation
  3. 2026.05.14 QAT, PTQ .. 모델 경량화
  4. 2026.05.11 리버스 ssh + autossh
  5. 2026.05.06 unet
  6. 2026.04.29 ffmpeg을 이용하여 gif 만들기
  7. 2026.04.27 postgresql pgvector
  8. 2026.04.20 vi 괄호끼리 이동 %
  9. 2026.03.31 ats mini v4
  10. 2026.03.13 링커 스크립트를 이용한 변수 값 할당
프로그램 사용/octave2026. 5. 19. 16:08

이미지 팩(?) 쓰려는데 에러가 나서 찾아보니 패키지 설치하란다. 

>> pkg load image;
error: package image is not installed
error: called from
    load_packages at line 47 column 7
    pkg at line 623 column 7
>>


멀 이렇게 많이 깔어.. -_-

$ sudo apt install octave-image
패키지 목록을 읽는 중입니다... 완료
의존성 트리를 만드는 중입니다... 완료
상태 정보를 읽는 중입니다... 완료        
다음의 추가 패키지가 설치될 것입니다 :
  default-jre-headless epstool fonts-freefont-otf libbtf1 libcombblas1.16.0
  libcxsparse3 libemf1 libfftw3-mpi3 libfltk-gl1.3 libfltk1.3 libglpk40
  libgraphicsmagick++-q16-12 libgraphicsmagick-q16-3 libhypre-2.22.1 libklu1
  libmumps-5.4 libpetsc-real3.15 libplot2c2 libpstoedit0c2a libptscotch-6.1
  libqhull8.0 libqrupdate1 libqscintilla2-qt5-15 libqscintilla2-qt5-l10n
  libscalapack-openmpi2.1 libscotch-6.1 libsundials-ida4
  libsundials-nvecparallel-petsc4 libsundials-nvecserial4
  libsundials-sunlinsol2 libsundials-sunmatrix2 libsuperlu-dist7
  libtrilinos-amesos-13.2 libtrilinos-aztecoo-13.2 libtrilinos-epetra-13.2
  libtrilinos-epetraext-13.2 libtrilinos-galeri-13.2 libtrilinos-ifpack-13.2
  libtrilinos-kokkos-13.2 libtrilinos-ml-13.2 libtrilinos-teuchos-13.2
  libtrilinos-trilinosss-13.2 libtrilinos-triutils-13.2
  libtrilinos-zoltan-13.2 mpi-default-bin octave octave-common octave-doc
  openmpi-bin openmpi-common pstoedit
제안하는 패키지:
  default-jre libfftw3-mpi-dev libiodbc2-dev default-libmysqlclient-dev
  graphicsmagick-dbg libqscintilla2-doc scalapack-doc octave-dev gfortran
  | fortran-compiler
다음 새 패키지를 설치할 것입니다:
  default-jre-headless epstool fonts-freefont-otf libbtf1 libcombblas1.16.0
  libcxsparse3 libemf1 libfftw3-mpi3 libfltk-gl1.3 libfltk1.3 libglpk40
  libgraphicsmagick++-q16-12 libgraphicsmagick-q16-3 libhypre-2.22.1 libklu1
  libmumps-5.4 libpetsc-real3.15 libplot2c2 libpstoedit0c2a libptscotch-6.1
  libqhull8.0 libqrupdate1 libqscintilla2-qt5-15 libqscintilla2-qt5-l10n
  libscalapack-openmpi2.1 libscotch-6.1 libsundials-ida4
  libsundials-nvecparallel-petsc4 libsundials-nvecserial4
  libsundials-sunlinsol2 libsundials-sunmatrix2 libsuperlu-dist7
  libtrilinos-amesos-13.2 libtrilinos-aztecoo-13.2 libtrilinos-epetra-13.2
  libtrilinos-epetraext-13.2 libtrilinos-galeri-13.2 libtrilinos-ifpack-13.2
  libtrilinos-kokkos-13.2 libtrilinos-ml-13.2 libtrilinos-teuchos-13.2
  libtrilinos-trilinosss-13.2 libtrilinos-triutils-13.2
  libtrilinos-zoltan-13.2 mpi-default-bin octave octave-common octave-doc
  octave-image openmpi-bin openmpi-common pstoedit
0개 업그레이드, 52개 새로 설치, 0개 제거 및 9개 업그레이드 안 함.
49.9 M바이트 아카이브를 받아야 합니다.
이 작업 후 171 M바이트의 디스크 공간을 더 사용하게 됩니다.
계속 하시겠습니까? [Y/n] 


엥.. 패키지 깔고 나니 octave 아이콘이 하나 더 생기고 실행해보니, 7.1.0 과 6.4.0 두개가 생겼다.


7.1.0 에서는 여전히 에러가 나는데

6.4.0 에서는 잘 된다. 머냐..? 버전 가리냐?

'프로그램 사용 > octave' 카테고리의 다른 글

octave로 공간 fft 돌려보기  (0) 2026.05.19
octave csv에서 읽어들이기  (0) 2024.11.26
octave audioread wav  (0) 2023.07.12
공짜 matlab? octave  (0) 2015.11.05
Posted by 구차니


[링크 : https://github.com/PINTO0309/TensorflowLite-UNet]

[링크 : https://huggingface.co/qualcomm/Unet-Segmentation]

[링크 : https://github.com/milesial/Pytorch-UNet]

[링크 : https://github.com/Rumit95/Auto_Segmentation] semantic segmentation

[링크 : https://github.com/Rumit95/Semantic-Segmentation-of-Image]


  • 클래스 1: 애완 동물에 속하는 픽셀
  • 클래스 2: 애완동물과 접하는 픽셀
  • 클래스 3: 위에 속하지 않음/주변 픽셀

[링크 : https://www.tensorflow.org/tutorials/images/segmentation?hl=ko]

'프로그램 사용 > yolo_tensorflow' 카테고리의 다른 글

MVTec AD 데이터 셋  (0) 2026.05.20
VAD - PaDiM, Patchcore - 정상이 아님을 탐지  (0) 2026.05.19
QAT, PTQ .. 모델 경량화  (0) 2026.05.14
unet  (0) 2026.05.06
얼굴인식 관련 조사  (0) 2025.10.02
Posted by 구차니

QAT - Quantization Aware Training

양자화 하지 않고 학습후

# Load MNIST dataset
mnist = keras.datasets.mnist
(train_images, train_labels), (test_images, test_labels) = mnist.load_data()

# Normalize the input image so that each pixel value is between 0 to 1.
train_images = train_images / 255.0
test_images = test_images / 255.0

# Define the model architecture.
model = keras.Sequential([
  keras.layers.InputLayer(input_shape=(28, 28)),
  keras.layers.Reshape(target_shape=(28, 28, 1)),
  keras.layers.Conv2D(filters=12, kernel_size=(3, 3), activation='relu'),
  keras.layers.MaxPooling2D(pool_size=(2, 2)),
  keras.layers.Flatten(),
  keras.layers.Dense(10)
])

# Train the digit classification model
model.compile(optimizer='adam',
              loss=tf.keras.losses.SparseCategoricalCrossentropy(from_logits=True),
              metrics=['accuracy'])

model.fit(
  train_images,
  train_labels,
  epochs=1,
  validation_split=0.1,
)


양자화 모델로 변환하고, 파인튜닝

import tensorflow_model_optimization as tfmot

quantize_model = tfmot.quantization.keras.quantize_model

# q_aware stands for for quantization aware.
q_aware_model = quantize_model(model)

# `quantize_model` requires a recompile.
q_aware_model.compile(optimizer='adam',
              loss=tf.keras.losses.SparseCategoricalCrossentropy(from_logits=True),
              metrics=['accuracy'])

q_aware_model.summary()

train_images_subset = train_images[0:1000] # out of 60000
train_labels_subset = train_labels[0:1000]

q_aware_model.fit(train_images_subset, train_labels_subset,
                  batch_size=500, epochs=1, validation_split=0.1)

[링크 : https://www.tensorflow.org/model_optimization/guide/quantization/training?hl=ko]


PTQ - Post Training Quantization

[링크 : https://www.tensorflow.org/model_optimization/guide/quantization/post_training?hl=ko]


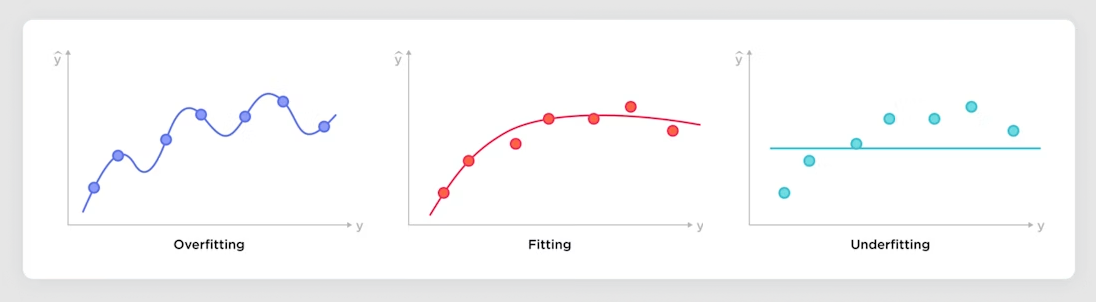
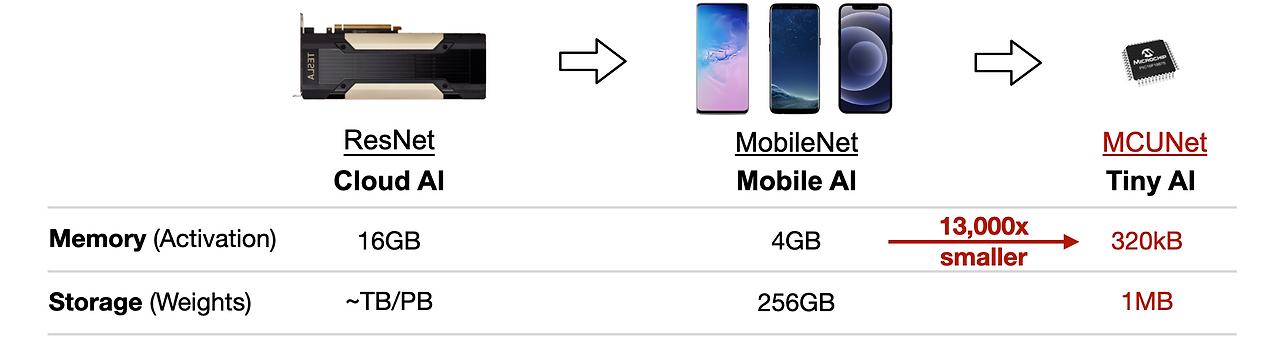
pruning - 0에 가까운 애들 없애기 (가지치기)

quantization (양자화)

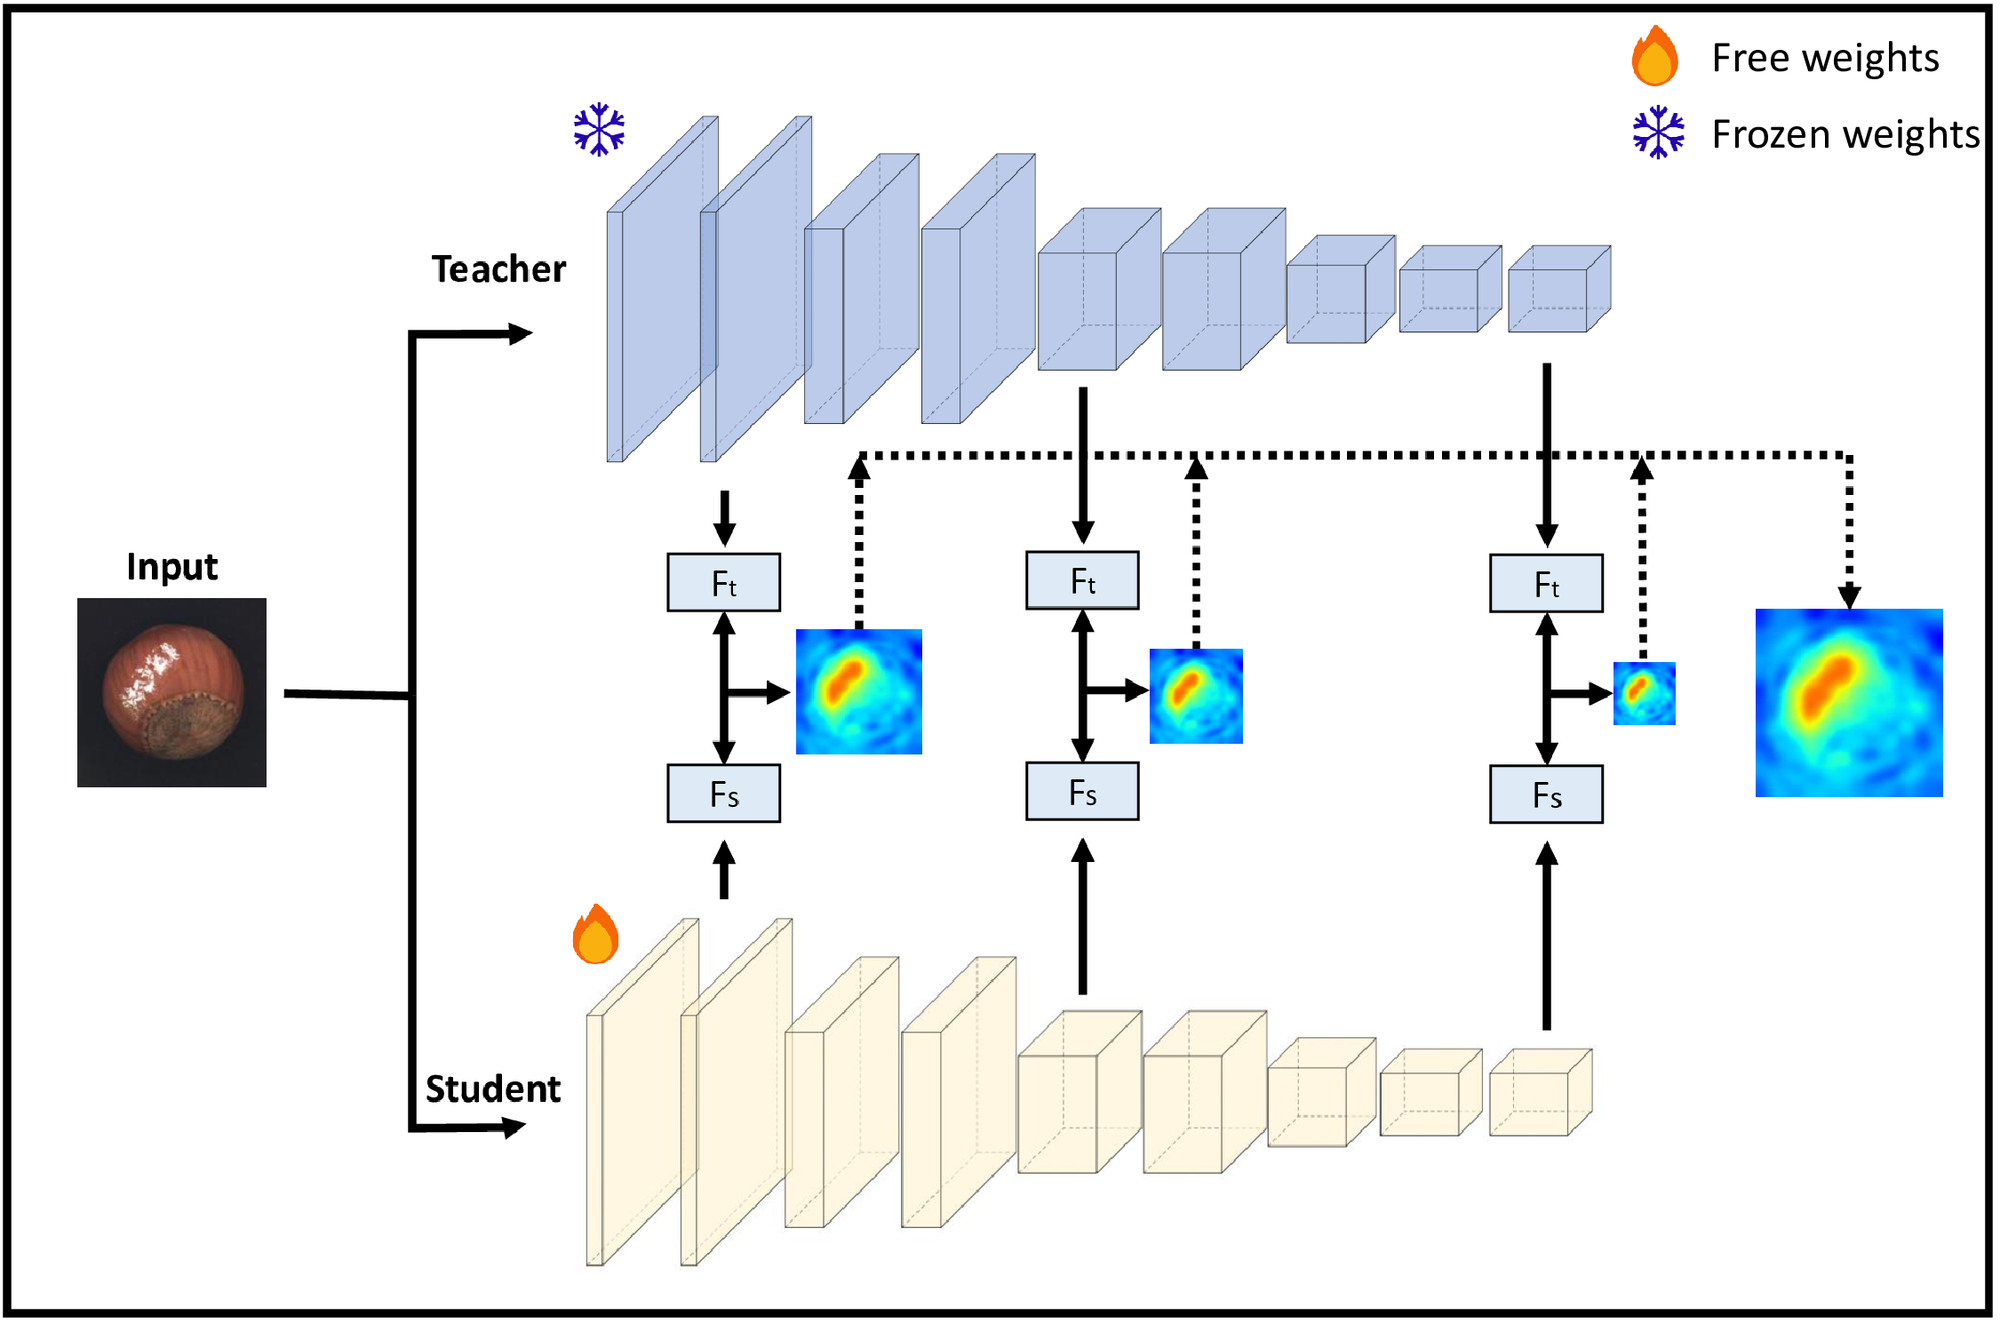
distillation (증류)

low rank factorization (NxM -> Xxk kxM)

[링크 : https://u-b-h.tistory.com/13]

[링크 : https://asidefine.tistory.com/318]

'프로그램 사용 > yolo_tensorflow' 카테고리의 다른 글

VAD - PaDiM, Patchcore - 정상이 아님을 탐지  (0) 2026.05.19
U-net, segmentation  (0) 2026.05.14
unet  (0) 2026.05.06
얼굴인식 관련 조사  (0) 2025.10.02
keras - transfer learning / fine tuning  (0) 2025.09.17
Posted by 구차니

아따 많이도 찾아봤었네 -_-

집에는 라즈베리 하나 켜놓고 회사에 켠 녀석을 집으로 SSH 접속하게 하고

집에서는 내부 아이피로 역으로 접속할수 있는 시스템을 만들려고 하는 중


[링크 : https://manpages.ubuntu.com/manpages/jammy/man1/autossh.1.html]

[링크 : https://lstm.tistory.com/10]

[링크 : https://m.clien.net/service/board/cm_linux/4344761]

[링크 : https://sangwonyoon.tistory.com/m/entry/Autossh로-SSH-연결-유지하기]


2018.05.14 - [프로그램 사용/ssh scp sftp] - reverse SSH

2021.01.03 - [프로그램 사용/ssh scp sftp] - reverse ssh


-------------------

2026.05.13

아래 링크의 옵션 참조했음

[링크 : https://donotlimityourself.tistory.com/33[


private(회사)

원격지에 2222 포트로 현재 pc의 22번 포트를 돌린다~ 라는 의미 인듯한데

그래서 listen에 추가로 포트가 열리지도 않았고, 정상적으로 실행이 되는 건가 보다.

$ ssh minimonk@집SSH도메인 -p 8022 -f -N -T -R 2222:localhost:22
minimonk@집SSH도메인's password: 
$ ps -ef | grep ssh
root         900       1  0  5월12 ?      00:00:00 sshd: /usr/sbin/sshd -D [listener] 0 of 10-100 startups
root        2298     900  0  5월12 ?      00:00:00 sshd: minimonk [priv]
minimonk    2385    2298  0  5월12 ?      00:05:27 sshd: minimonk@pts/0
root        5656     900  0  5월12 ?      00:00:00 sshd: minimonk [priv]
minimonk    5735    5656  0  5월12 ?      00:00:00 sshd: minimonk@pts/7
minimonk   10717       1  0 09:58 ?        00:00:00 ssh minimonk@집SSH도메인 -p 8022 -f -N -T -R 2222:localhost:22
minimonk   10719    5736  0 09:58 pts/7    00:00:00 grep --color=auto ssh

$ netstat -tnlp
(Not all processes could be identified, non-owned process info
 will not be shown, you would have to be root to see it all.)
Active Internet connections (only servers)
Proto Recv-Q Send-Q Local Address           Foreign Address         State       PID/Program name    
tcp        0      0 127.0.0.1:39557         0.0.0.0:*               LISTEN      3128/language_serve 
tcp        0      0 127.0.0.1:5803          0.0.0.0:*               LISTEN      5350/llama-server   
tcp        0      0 127.0.0.1:38605         0.0.0.0:*               LISTEN      3128/language_serve 
tcp        0      0 127.0.0.1:6010          0.0.0.0:*               LISTEN      -                   
tcp        0      0 127.0.0.1:6012          0.0.0.0:*               LISTEN      -                   
tcp        0      0 127.0.0.1:45837         0.0.0.0:*               LISTEN      6184/language_serve 
tcp        0      0 0.0.0.0:7860            0.0.0.0:*               LISTEN      5584/venv/bin/pytho 
tcp        0      0 127.0.0.1:36141         0.0.0.0:*               LISTEN      6184/language_serve 
tcp        0      0 127.0.0.1:36197         0.0.0.0:*               LISTEN      6184/language_serve 
tcp        0      0 0.0.0.0:22              0.0.0.0:*               LISTEN      -                   
tcp        0      0 127.0.0.1:44747         0.0.0.0:*               LISTEN      3016/antigravity    
tcp        0      0 127.0.0.1:35159         0.0.0.0:*               LISTEN      6061/exe            
tcp        0      0 127.0.0.1:34279         0.0.0.0:*               LISTEN      3016/antigravity    
tcp        0      0 127.0.0.53:53           0.0.0.0:*               LISTEN      -                   
tcp        0      0 127.0.0.1:631           0.0.0.0:*               LISTEN      -                   
tcp6       0      0 :::5900                 :::*                    LISTEN      1502/gnome-remote-d 
tcp6       0      0 ::1:631                 :::*                    LISTEN      -                   
tcp6       0      0 :::8080                 :::*                    LISTEN      5256/./llama-swap   
tcp6       0      0 :::22                   :::*                    LISTEN      -                   
tcp6       0      0 ::1:6010                :::*                    LISTEN      -                   
tcp6       0      0 ::1:6012                :::*                    LISTEN      -                   
tcp6       0      0 :::3389                 :::*                    LISTEN      1502/gnome-remote-d 


public(내 집)

접속전
$ netstat -tnlp
(Not all processes could be identified, non-owned process info
 will not be shown, you would have to be root to see it all.)
Active Internet connections (only servers)
Proto Recv-Q Send-Q Local Address           Foreign Address         State       PID/Program name    
tcp        0      0 0.0.0.0:22              0.0.0.0:*               LISTEN      -                   
tcp6       0      0 :::22                   :::*                    LISTEN      -  

접속후
$ netstat -tnlp
(Not all processes could be identified, non-owned process info
 will not be shown, you would have to be root to see it all.)
Active Internet connections (only servers)
Proto Recv-Q Send-Q Local Address           Foreign Address         State       PID/Program name    
tcp        0      0 0.0.0.0:22              0.0.0.0:*               LISTEN      -                   
tcp        0      0 127.0.0.1:2222          0.0.0.0:*               LISTEN      -                   
tcp6       0      0 :::22                   :::*                    LISTEN      -                   
tcp6       0      0 ::1:2222                :::*                    LISTEN      -      


SSH 옵션을 보면 -fNTR 에서  -f이 백그라운드로 뜨게 하느것이고

NT는 터미널 관련, 명령 실행 관련

R은 원격지 포트에 내껄 붙인다는 의미

역시 NTR은 좋은것이여... (응?)

     -f      Requests ssh to go to background just before command execution.
             This is useful if ssh is going to ask for passwords or
             passphrases, but the user wants it in the background.  This im‐
             plies -n.  The recommended way to start X11 programs at a remote
             site is with something like ssh -f host xterm.

             If the ExitOnForwardFailure configuration option is set to “yes”,
             then a client started with -f will wait for all remote port for‐
             wards to be successfully established before placing itself in the
             background.  Refer to the description of ForkAfterAuthentication
             in ssh_config(5) for details.


     -N      Do not execute a remote command.  This is useful for just for‐
             warding ports.  Refer to the description of SessionType in
             ssh_config(5) for details.

     -T      Disable pseudo-terminal allocation.

     -R [bind_address:]port:host:hostport
     -R [bind_address:]port:local_socket
     -R remote_socket:host:hostport
     -R remote_socket:local_socket
     -R [bind_address:]port
             Specifies that connections to the given TCP port or Unix socket
             on the remote (server) host are to be forwarded to the local
             side.


이제 autossh를 설치하고

$ sudo apt-get install autossh
Reading package lists... Done
Building dependency tree... Done
Reading state information... Done
The following NEW packages will be installed:
  autossh
0 upgraded, 1 newly installed, 0 to remove and 47 not upgraded.
Need to get 29.2 kB of archives.
After this operation, 89.1 kB of additional disk space will be used.
Get:1 http://kr.archive.ubuntu.com/ubuntu jammy/universe amd64 autossh amd64 1.4g-1 [29.2 kB]
Fetched 29.2 kB in 0s (217 kB/s)   
Selecting previously unselected package autossh.
(Reading database ... 322586 files and directories currently installed.)
Preparing to unpack .../autossh_1.4g-1_amd64.deb ...
Unpacking autossh (1.4g-1) ...
Setting up autossh (1.4g-1) ...
Processing triggers for man-db (2.10.2-1) ...


 public 쪽에 로그인이 되도록 키를 복사하려는데 안되네 -_-???

아무튼 키를 생성하고 해주면 끝

$ ssh-copy-id -p 8022 minimonk@집SSH도메인
/usr/bin/ssh-copy-id: ERROR: No identities found

$ ssh-keygen


-f 를 넣으면 키를 넣어줘도 로그인이 안되서 일단 빼고 하니 되긴한데..

$ autossh -M -0 -o "ServerAliveinterval 30" -o "ServerAliveCountMax 3" -T -R 2222:localhost:22 minimonk@집SSH도메인 -p 2022

[링크 : https://sangwonyoon.tistory.com/entry/Autossh로-SSH-연결-유지하기]


autossh가 죽으면 어쩌지 싶어서 데몬으로 된 거 없나 찾아 봐야 할 듯.

[링크 : https://tecadmin.net/autossh-persistent-ssh-connections/]


+

여러 번의 인자를 사용하면 복수의 포트를 포워딩 할 수 있다.

ssh remote-host -L 8822:REMOTE_IP_1:22 -L 9922:REMOTE_IP_2:22

[링크 : https://stackoverflow.com/questions/29936948/ssh-l-forward-multiple-ports]


+

아래를 public 쪽 sshd_config 에 설정해주고 sshd를 재기동하고

$ cat /etc/ssh/sshd_config
# GatewayPorts no
GatewayPorts yes
$ sudo systemctl restart sshd


2222 대신 0.0.0.0:2222 라고 입력하고 실행하면

$ ssh minimonk@집SSH도메인 -p 8022 -f -N -T -R 0.0.0.0:2222:localhost:22


localhost로 되어있던걸

$ netstat -tnlp
(Not all processes could be identified, non-owned process info
 will not be shown, you would have to be root to see it all.)
Active Internet connections (only servers)
Proto Recv-Q Send-Q Local Address           Foreign Address         State       PID/Program name
tcp        0      0 0.0.0.0:22              0.0.0.0:*               LISTEN      -
tcp        0      0 127.0.0.1:2222          0.0.0.0:*               LISTEN      -
tcp        0      0 127.0.0.1:6010          0.0.0.0:*               LISTEN      -
tcp6       0      0 :::22                   :::*                    LISTEN      -
tcp6       0      0 ::1:2222                :::*                    LISTEN      -
tcp6       0      0 ::1:6010                :::*                    LISTEN      -


0.0.0.0 으로 바꾸어서 public 서버의 서비스 인것 처럼 붙일수도 있다.

$ netstat -tnlp
(Not all processes could be identified, non-owned process info
 will not be shown, you would have to be root to see it all.)
Active Internet connections (only servers)
Proto Recv-Q Send-Q Local Address           Foreign Address         State       PID/Program name
tcp        0      0 0.0.0.0:22              0.0.0.0:*               LISTEN      -
tcp        0      0 0.0.0.0:2222            0.0.0.0:*               LISTEN      -
tcp        0      0 127.0.0.1:6010          0.0.0.0:*               LISTEN      -
tcp6       0      0 :::22                   :::*                    LISTEN      -
tcp6       0      0 :::2222                 :::*                    LISTEN      -
tcp6       0      0 ::1:6010                :::*                    LISTEN      -

'프로그램 사용 > ssh scp sftp' 카테고리의 다른 글

ssh -t  (0) 2025.09.08
ssh-copy-id  (0) 2025.04.18
ssh socks proxy  (0) 2024.07.22
ssh ecdsa 미지원(ubuntu 22.04)  (0) 2023.05.30
ubuntu ssh x11 forwarding시 gnome 화면 끌어오기  (0) 2022.07.11
Posted by 구차니

'프로그램 사용 > yolo_tensorflow' 카테고리의 다른 글

U-net, segmentation  (0) 2026.05.14
QAT, PTQ .. 모델 경량화  (0) 2026.05.14
얼굴인식 관련 조사  (0) 2025.10.02
keras - transfer learning / fine tuning  (0) 2025.09.17
keras ssd mobilenet  (0) 2025.09.16
Posted by 구차니

순서가 은근히 중요하네

4 frame(250ms 간격으로 Fan1.bmp / Fan2.bmp / Fan3.bmp 를 읽어서 만들고 무한반복 시킴

아래는 되는 예

$ ffmpeg -framerate 4 -i Fan%d.bmp -loop 0 fan_1000ms.gif


시간 간격 안되는 예

ffmpeg -i Fan%d.bmp -framerate 3 -loop 0 fan_333ms.gif


ffmpeg에서 %d는 확장하는데 ? 와 *은 쉘에서 확장되서 정상적으로 작동하지 않는다

명시적으로는 -i "concat:파일명|다음파일명" 으로 하면 된다.

ffmpeg -framerate 3 -i "concat:Fan1.bmp|Fan2.bmp|Fan3.bmp" -loop 0 fan_500ms.gif


Posted by 구차니

'프로그램 사용 > postgreSQL' 카테고리의 다른 글

postgresql 리스트 명령  (0) 2024.07.25
postgresql permission denied for schema public  (0) 2024.07.25
라즈베리에 phppgadmin. 안되잖아?  (0) 2024.07.24
phppgadmin  (0) 2024.07.23
postgresql 15.7 on rpi  (0) 2024.07.22
Posted by 구차니
프로그램 사용/vi2026. 4. 20. 10:08

와우 이런 개꾸르

[링크 : https://wikidocs.net/302522#_15]


어쩌면 이것도 검색해놓고 까먹었을지도...

'프로그램 사용 > vi' 카테고리의 다른 글

vi 이전 위치 다음 위치로 이동하기  (0) 2022.08.04
vi가 늦게 켜지는 이유  (0) 2022.07.28
vim 색상 바꾸기(colorscheme)  (0) 2021.01.20
vi 에서 매칭되는 갯수 확인하기  (0) 2019.12.18
vi gg=G와 set ts  (0) 2019.07.04
Posted by 구차니
프로그램 사용/rtl-sdr2026. 3. 31. 19:00

esp32 등을 이용한 RTL-SDR 의 간이형이라고 해야하나?

[링크 : https://atsmini.github.io/]


v4 는 이어폰도 있는거 봐서는 단순하게 DAC을 통해 ROUT / LOUT으로 바로 출력하는 듯.

굳이 복잡하게 i2s 할 필요가 없는 제품일듯.

[링크 : https://www.amazon.com/YJIPOWA-Receiver-Amnvolt-Headphone-Amplifier/dp/B0FXRQSN4J]


si4732 라는 칩을 이용해서 원하는 주파수를 받을수 있는 듯.

일단 digital audio out을 지원한다는데

Features
- Worldwide FM band support (64–108 MHz)
- Worldwide AM band support (520–1710 kHz)
- SW band support (2.3–26.1 MHz)
- LW band support (153–279 kHz)

[링크 : https://www.skyworksinc.com/-/media/Skyworks/SL/documents/public/data-shorts/Si4732-A10-short.pdf]

  [링크 : https://www.digikey.kr/ko/products/detail/skyworks-solutions-inc/SI4732-A10-GS/4576679]


귀찮으면(!) Analog audio output 으로 해서 그냥 스피커 달아도 되는 듯한데


디지털은 I2S로 쓸 수 있다. (이거면 그냥 가장 편할 듯?)

[링크 : https://aitendo3.sakura.ne.jp/aitendo_data/product_img/ic/radio/SI4732-A10/AN332.pdf]


[링크 : https://m.vctec.co.kr/product/amfmselwrds-라디오-리시버-모듈-si4732-amfm-2-click/22607/]


'프로그램 사용 > rtl-sdr' 카테고리의 다른 글

rtl-sdr v3/v4  (0) 2025.10.06
wifi sdr - openwifi, antsdr 등등  (0) 2025.09.26
gr-lora with gnuradio 성공!  (0) 2025.09.25
gnuraduio wx gui deprecated  (0) 2025.09.25
qr-lora tutorial  (0) 2025.09.25
Posted by 구차니
프로그램 사용/gcc2026. 3. 13. 15:33

링커 스크립트에서 만든 변수를

c에서 끌어오려면 extern 을 해주면 계산된 값이 불려온다.


SECTIONS
{
    /* Starts at LOADER_ADDR. */
    . = 0x80000;
    /* For AArch64, use . = 0x80000; */
    __start = .;
    __text_start = .;
    .text :
    {
        KEEP(*(.text.boot))
        *(.text)
    }
    . = ALIGN(4096); /* align to page size */
    __text_end = .;

    __bss_start = .;
    .bss :
    {
        bss = .;
        *(.bss)
    }
    . = ALIGN(4096); /* align to page size */
    __bss_end = .;
    __bss_size = __bss_end - __bss_start;
    __end = .;
}
: 저 변수들은 실제 저안에서 사용된다기 보다는 소스 코드(C 파일 혹은 어셈블리어 파일)상에서 사용되면서 의미가 부여된다. 저 변수들을 소스 코드상에서 불러 오려면 어떻게 해야 할까? 아래의 코드를 보자.

extern unsgined char __text_start
uint8_t *text_start = &__text_start;

+
extern usigned int __bss_size;

[링크 : https://yohda.tistory.com/entry/LINUXBUILD-링커스크립트]

[링크 : https://gustorage.tistory.com/27]

Posted by 구차니