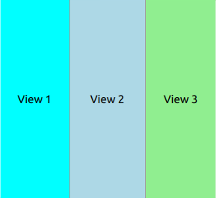
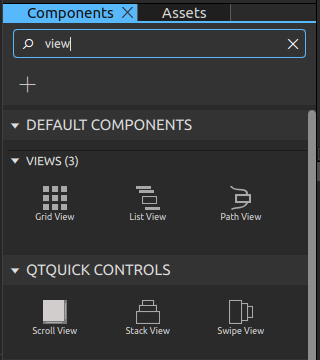
This property holds the index position of the widget that is visible The current index is -1 if there is no current widget. By default, this property contains a value of -1 because the stack is initially empty.
sx1276 예제를 보다보니 mbed쪽(?) 드라이버 소스에 함수인데 "= 0"를 해둔게 있어서 이게 머야 하고 검색해보니
순수 가상 함수라는 이상한(?) 이름이 붙은 녀석이 발견되었다.
어떻게 보면 java에서 interface 로 선언되는 녀석과 비슷하게 실 구현체가 없이 선언되고
무조건 구현해서 사용해야 하는 녀석 같은데.. 참 난해한 문법형태구만..
그런데 cpp에 원래 virtual 키워드가 있었던..가?
/*! * @brief Checks if the given RF frequency is supported by the hardware * * @param [IN] frequency RF frequency to be checked * @retval isSupported [true: supported, false: unsupported] */ virtual bool CheckRfFrequency( uint32_t frequency ) = 0;
class Base { public: virtual void NameOf(); // Virtual function. void InvokingClass(); // Nonvirtual function. };
// Implement the two functions. void Base::NameOf() { cout << "Base::NameOf\n"; }
void Base::InvokingClass() { cout << "Invoked by Base\n"; }
class Derived : public Base { public: void NameOf(); // Virtual function. void InvokingClass(); // Nonvirtual function. };
// Implement the two functions. void Derived::NameOf() { cout << "Derived::NameOf\n"; }
void Derived::InvokingClass() { cout << "Invoked by Derived\n"; }
int main() { // Declare an object of type Derived. Derived aDerived;
// Declare two pointers, one of type Derived * and the other // of type Base *, and initialize them to point to aDerived. Derived *pDerived = &aDerived; Base *pBase = &aDerived;
특이한게 배열 loop 돌다 터지는게 아니라 다 돌고 나서 free 가려다가 터진다. 신기하네
$ gcc t2.c -g -fsanitize=address $ ./a.out ================================================================= ==2713847==ERROR: AddressSanitizer: heap-buffer-overflow on address 0x504000000038 at pc 0x609d568b42e0 bp 0x7ffdaa34e820 sp 0x7ffdaa34e810 WRITE of size 4 at 0x504000000038 thread T0 #0 0x609d568b42df in main /home/minimonk/work/src/malloc/t2.c:9 #1 0x7cc2e8429d8f in __libc_start_call_main ../sysdeps/nptl/libc_start_call_main.h:58 #2 0x7cc2e8429e3f in __libc_start_main_impl ../csu/libc-start.c:392 #3 0x609d568b41a4 in _start (/home/minimonk/work/src/malloc/a.out+0x11a4)
0x504000000038 is located 0 bytes to the right of 40-byte region [0x504000000010,0x504000000038) allocated by thread T0 here: #0 0x7cc2e88b4887 in __interceptor_malloc ../../../../src/libsanitizer/asan/asan_malloc_linux.cpp:145 #1 0x609d568b4286 in main /home/minimonk/work/src/malloc/t2.c:7 #2 0x7cc2e8429d8f in __libc_start_call_main ../sysdeps/nptl/libc_start_call_main.h:58
SUMMARY: AddressSanitizer: heap-buffer-overflow /home/minimonk/work/src/malloc/t2.c:9 in main Shadow bytes around the buggy address: 0x0a087fff7fb0: 00 00 00 00 00 00 00 00 00 00 00 00 00 00 00 00 0x0a087fff7fc0: 00 00 00 00 00 00 00 00 00 00 00 00 00 00 00 00 0x0a087fff7fd0: 00 00 00 00 00 00 00 00 00 00 00 00 00 00 00 00 0x0a087fff7fe0: 00 00 00 00 00 00 00 00 00 00 00 00 00 00 00 00 0x0a087fff7ff0: 00 00 00 00 00 00 00 00 00 00 00 00 00 00 00 00 =>0x0a087fff8000: fa fa 00 00 00 00 00[fa]fa fa fa fa fa fa fa fa 0x0a087fff8010: fa fa fa fa fa fa fa fa fa fa fa fa fa fa fa fa 0x0a087fff8020: fa fa fa fa fa fa fa fa fa fa fa fa fa fa fa fa 0x0a087fff8030: fa fa fa fa fa fa fa fa fa fa fa fa fa fa fa fa 0x0a087fff8040: fa fa fa fa fa fa fa fa fa fa fa fa fa fa fa fa 0x0a087fff8050: fa fa fa fa fa fa fa fa fa fa fa fa fa fa fa fa Shadow byte legend (one shadow byte represents 8 application bytes): Addressable: 00 Partially addressable: 01 02 03 04 05 06 07 Heap left redzone: fa Freed heap region: fd Stack left redzone: f1 Stack mid redzone: f2 Stack right redzone: f3 Stack after return: f5 Stack use after scope: f8 Global redzone: f9 Global init order: f6 Poisoned by user: f7 Container overflow: fc Array cookie: ac Intra object redzone: bb ASan internal: fe Left alloca redzone: ca Right alloca redzone: cb Shadow gap: cc ==2713847==ABORTING
idx 값을 보면 10000번 돌았는데
printf 하려고 하면 바로 malloc(): corrupted top size 하면서 터진다.
$ gdb ./a.out GNU gdb (Ubuntu 12.1-0ubuntu1~22.04.2) 12.1 Copyright (C) 2022 Free Software Foundation, Inc. License GPLv3+: GNU GPL version 3 or later <http://gnu.org/licenses/gpl.html> This is free software: you are free to change and redistribute it. There is NO WARRANTY, to the extent permitted by law. Type "show copying" and "show warranty" for details. This GDB was configured as "x86_64-linux-gnu". Type "show configuration" for configuration details. For bug reporting instructions, please see: <https://www.gnu.org/software/gdb/bugs/>. Find the GDB manual and other documentation resources online at: <http://www.gnu.org/software/gdb/documentation/>.
For help, type "help". Type "apropos word" to search for commands related to "word"... Reading symbols from ./a.out... (gdb) l 1 #include <stdio.h> 2 #include <stdlib.h> 3 4 void main() 5 { 6 int *arr = NULL; 7 arr = (int*)malloc(10 * sizeof(int)); 8 int idx = 0; 9 for(idx = 0; idx < 10000; idx++) 10 arr[idx] = idx; (gdb) l 11 6 int *arr = NULL; 7 arr = (int*)malloc(10 * sizeof(int)); 8 int idx = 0; 9 for(idx = 0; idx < 10000; idx++) 10 arr[idx] = idx; 11 12printf("before\n"); 13 fflush(stdout); 14 15 free(arr); (gdb) b 12 Breakpoint 1 at 0x1201: file t2.c, line 12. (gdb) r Starting program: /home/minimonk/work/src/malloc/a.out [Thread debugging using libthread_db enabled] Using host libthread_db library "/lib/x86_64-linux-gnu/libthread_db.so.1".
Breakpoint 1, main () at t2.c:12 12 printf("before\n"); (gdb) print idx $1 = 10000 (gdb) n malloc(): corrupted top size
Program received signal SIGABRT, Aborted. __pthread_kill_implementation (no_tid=0, signo=6, threadid=140737353705280) at ./nptl/pthread_kill.c:44 44 ./nptl/pthread_kill.c: 그런 파일이나 디렉터리가 없습니다.
그래서 printf / fflush 주석처리하고 free를 바로 브레이크 포인트 잡아서 해도 동일하게
루프 종료되면서 바로 에러가 나는 것 같기도...
15 free(arr); (gdb) c Continuing. malloc(): corrupted top size
Program received signal SIGABRT, Aborted. __pthread_kill_implementation (no_tid=0, signo=6, threadid=140737353705280) at ./nptl/pthread_kill.c:44 44 ./nptl/pthread_kill.c: 그런 파일이나 디렉터리가 없습니다. (gdb)
layout 에다가 widget을 추가하고 layout을 stack 해서 새 창을 띄울 것들을 새로운 stack에 넣어서 하는 것도 방법이고
아니면 위젯을 스택해서 쓰는것도 방법일 듯 한데
구조적으로는 stackedlayout에 widget을 넣어 운영하는게 좀 더 맞는 듯?
QStackedLayout
QStackedWidget
import sys, os
# Qt 바인딩을 PySide6 우선 사용하고, 실패 시 PyQt6 사용 qt_modules = None
# PySide6을 먼저 시도 try: from PySide6.QtWidgets import ( QApplication, QWidget, QStackedLayout, QVBoxLayout, QLabel, QComboBox, ) from PySide6.QtGui import QPixmap qt_modules = 'PySide6' except ImportError: # 실패 시 PyQt6 시도 try: from PyQt6.QtWidgets import ( QApplication, QWidget, QStackedLayout, QVBoxLayout, QLabel, QComboBox, ) from PyQt6.QtGui import QPixmap qt_modules = 'PyQt6' except ImportError: # 둘 다 실패하면 메시지 출력 후 종료 print("There is no Qt Binding for Python.") sys.exit(1)
# 사용된 Qt 바인딩 이름 출력 print(f"Using {qt_modules} binding.")
# ------------------------------------
# 메인 윈도우 클래스 정의 class MW(QWidget): def __init__(self): super().__init__() self.init_ui()
def init_ui(self): # 윈도우 타이틀 설정 self.setWindowTitle("Ex Input Widgets") # 메인 위젯 및 레이아웃 구성 self.setup_main_wnd() # 윈도우 표시 self.show()
def setup_main_wnd(self): # 현재 파일의 절대 경로 기준 디렉토리 경로 얻기 fpath = os.path.dirname( os.path.abspath(__file__) )
# 콤보박스에 표시될 페이지 이름들 pages = ['faith', 'hope', 'love']
# 각 페이지에 해당하는 이미지 파일 경로 리스트 self.imgs = [ os.path.join(fpath, 'img','faith.png'), os.path.join(fpath, 'img','hope.png'), os.path.join(fpath, 'img','love.png') ]
# 콤보박스 생성 및 항목 추가 combo_box = QComboBox() combo_box.addItems(pages) # 콤보박스 항목이 선택되면 change_page 함수 실행 combo_box.activated.connect(self.change_page)
# QStackedLayout 생성 (여러 페이지를 겹쳐서 보관, 하나만 보여줌) self.stacked_lm = QStackedLayout()
# 페이지 수만큼 QLabel 생성 후 QStackedLayout에 추가 for idx, c in enumerate(pages): label = self.setup_page(idx) # QLabel을 생성하고 이미지 설정 self.stacked_lm.addWidget(label) # 스택에 추가
# 수직 박스 레이아웃 생성 v_box_lm = QVBoxLayout() v_box_lm.addWidget(combo_box) # 콤보박스를 위에 추가 # 스택 레이아웃을 아래에 추가 # v_box_lm.addLayout(self.stacked_lm) # 이 한줄로 아래 3개라인을 대체 가능. tmp_c = QWidget() tmp_c.setLayout(self.stacked_lm) v_box_lm.addWidget(tmp_c)
# 최종 레이아웃을 윈도우에 설정 self.setLayout(v_box_lm)
# 페이지용 QLabel 설정 함수 def setup_page(self, page_num): label = QLabel() pixmap = QPixmap(self.imgs[page_num]) # 해당 이미지 불러오기 label.setPixmap(pixmap) # QLabel에 이미지 설정 label.setScaledContents(True) # QLabel 크기에 맞게 이미지 자동 조절 return label
# 콤보박스에서 선택된 인덱스에 해당하는 페이지를 보여줌 def change_page(self, idx): self.stacked_lm.setCurrentIndex(idx)
# ------------------------------------
# 프로그램 진입점 if __name__ == "__main__": print(os.path.realpath(__file__)) # 현재 실행 중인 파일 경로 출력 app = QApplication(sys.argv) # QApplication 인스턴스 생성 main_wnd = MW() # 메인 윈도우 생성 sys.exit(app.exec()) # 이벤트 루프 실행
try: from PySide6.QtWidgets import ( QApplication, QWidget, QLabel, QVBoxLayout, QComboBox, QStackedWidget ) from PySide6.QtGui import QPixmap qt_modules = 'PySide6' except ImportError: try: from PyQt6.QtWidgets import ( QApplication, QWidget, QLabel, QVBoxLayout, QComboBox, QStackedWidget ) from PyQt6.QtGui import QPixmap qt_modules = 'PyQt6' except ImportError: print("There is no Qt Binding for Python.") sys.exit(1)
print(f"Using {qt_modules} binding.")
# ------------------------------------
class MW(QWidget): def __init__(self): super().__init__() self.init_ui()
def init_ui(self): self.setWindowTitle("Ex: QStackedWidget with ComboBox") self.setup_main_wnd() self.show()
def setup_main_wnd(self): # 현재 스크립트 경로를 기준으로 이미지 파일 위치 설정 fpath = os.path.dirname(os.path.abspath(__file__))
# 페이지 이름과 이미지 경로 정의 pages = ['faith', 'hope', 'love'] self.imgs = [ os.path.join(fpath, 'img/faith.png'), os.path.join(fpath, 'img/hope.png'), os.path.join(fpath, 'img/love.png') ]
# 콤보박스 생성 및 페이지 이름 추가 combo_box = QComboBox() combo_box.addItems(pages) combo_box.activated.connect(self.change_page)
# QStackedWidget 생성 self.stack_widget = QStackedWidget()
# 각 페이지에 해당하는 QLabel + 이미지 추가 for idx in range(len(pages)): label = QLabel() pixmap = QPixmap(self.imgs[idx]) label.setPixmap(pixmap) label.setScaledContents(True) # 이미지가 QLabel에 맞게 리사이즈됨 self.stack_widget.addWidget(label)
# 수직 레이아웃 구성: 콤보박스 위, 이미지 아래 layout = QVBoxLayout() layout.addWidget(combo_box) layout.addWidget(self.stack_widget)
self.setLayout(layout)
# 콤보박스 인덱스 선택 시 보여줄 페이지 변경 def change_page(self, idx): self.stack_widget.setCurrentIndex(idx)
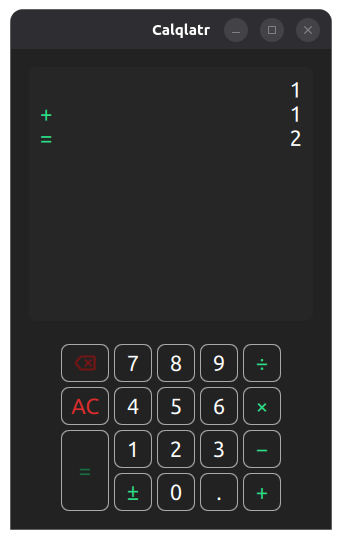
// remove the margin on the side that the numberPad is on, to prevent a double margin Layout.bottomMargin: root.isPortraitMode ? 0 : root.margin Layout.rightMargin: root.isPortraitMode ? root.margin : 0 }
Keys.onPressed: function (event) { switch (event.key) { case Qt.Key_0: state.digitPressed("0"); break; case Qt.Key_1: state.digitPressed("1"); break; case Qt.Key_2: state.digitPressed("2"); break; case Qt.Key_3: state.digitPressed("3"); break; case Qt.Key_4: state.digitPressed("4"); break; case Qt.Key_5: state.digitPressed("5"); break; case Qt.Key_6: state.digitPressed("6"); break; case Qt.Key_7: state.digitPressed("7"); break; case Qt.Key_8: state.digitPressed("8"); break; case Qt.Key_9: state.digitPressed("9"); break; case Qt.Key_E: state.digitPressed("e"); break; case Qt.Key_P: state.digitPressed("π"); break; case Qt.Key_Plus: state.operatorPressed("+"); break; case Qt.Key_Minus: state.operatorPressed("-"); break; case Qt.Key_Asterisk: state.operatorPressed("×"); break; case Qt.Key_Slash: state.operatorPressed("÷"); break; case Qt.Key_Enter: case Qt.Key_Return: state.operatorPressed("="); break; case Qt.Key_Comma: case Qt.Key_Period: state.digitPressed("."); break; case Qt.Key_Backspace: state.operatorPressed("bs"); break; } } } }
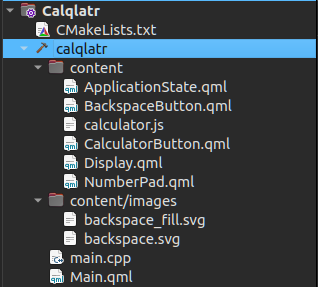
ApplicationState.qml
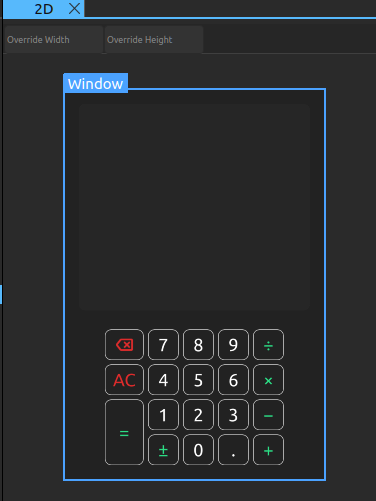
말로는 qml 인데 design에서 보여지는 요소는 존재하지 않고
main.qml 에서 호출되는 operatorPressed() 나 digitPressed()와 같은 함수가 존재한다.
특이한건 import as 인데 js를 불러서 CalcEngine 으로 사용하는 부분 정도?
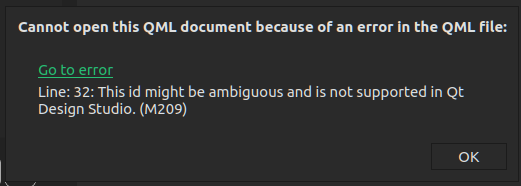
그 와중에 Display는 display.qml 에서 끌려오는건가?
// Copyright (C) 2023 The Qt Company Ltd. // SPDX-License-Identifier: LicenseRef-Qt-Commercial OR BSD-3-Clause
import QtQml import "calculator.js" as CalcEngine
QtObject { required property Display display
function operatorPressed(operator) { CalcEngine.operatorPressed(operator, display); } function digitPressed(digit) { CalcEngine.digitPressed(digit, display); } function isButtonDisabled(op) { return CalcEngine.isOperationDisabled(op, display); } }
calculator.js
평범한(?) js로 작성된 코드가 존재한다.
// Copyright (C) 2023 The Qt Company Ltd. // SPDX-License-Identifier: LicenseRef-Qt-Commercial OR BSD-3-Clause
let accumulator = 0 let pendingOperator = "" let lastButton = "" let digits = ""
function isOperationDisabled(op, display) { if (digits !== "" && lastButton !== "=" && (op === "π" || op === "e")) return true if (digits === "" && !((op >= "0" && op <= "9") || op === "π" || op === "e" || op === "AC")) return true if (op === "bs" && (display.isOperandEmpty() || !((lastButton >= "0" && lastButton <= "9") || lastButton === "π" || lastButton === "e" || lastButton === "."))) return true if (op === '=' && pendingOperator.length != 1) return true if (op === "." && digits.search(/\./) != -1) return true if (op === "√" && digits.search(/-/) != -1) return true if (op === "AC" && display.isDisplayEmpty()) return true
return false }
function digitPressed(op, display) { if (isOperationDisabled(op, display)) return if (lastButton === "π" || lastButton === "e") return // handle mathematical constants if (op === "π") { lastButton = op digits = Math.PI.toPrecision(display.maxDigits - 1).toString() display.appendDigit(digits) return } if (op === "e") { lastButton = op digits = Math.E.toPrecision(display.maxDigits - 1).toString() display.appendDigit(digits) return }
// append a digit to another digit or decimal point if (lastButton.toString().length === 1 && ((lastButton >= "0" && lastButton <= "9") || lastButton === ".") ) { if (digits.length >= display.maxDigits) return digits = digits + op.toString() display.appendDigit(op.toString()) // else just write a single digit to display } else { digits = op.toString() display.appendDigit(digits) } lastButton = op }
function operatorPressed(op, display) { if (isOperationDisabled(op, display)) return
function appendDigit(digit) { if (!enteringDigits) calculationsListView.model.append({ "operator": "", "operand": "" }); const i = calculationsListView.model.count - 1; calculationsListView.model.get(i).operand = calculationsListView.model.get(i).operand + digit; enteringDigits = true; calculationsListView.positionViewAtEnd(); }
function setDigit(digit) { const i = calculationsListView.model.count - 1; calculationsListView.model.get(i).operand = digit; calculationsListView.positionViewAtEnd(); }
function backspace() { const i = calculationsListView.model.count - 1; if (i >= 0) { let operand = calculationsListView.model.get(i).operand.toString().slice(0, -1); if (operand === "-") operand = ""; calculationsListView.model.get(i).operand = operand; return; } return; }
function isOperandEmpty() { const i = calculationsListView.model.count - 1; return i >= 0 ? calculationsListView.model.get(i).operand === "" : true; }
function isDisplayEmpty() { const i = calculationsListView.model.count - 1; return i == -1 ? true : (i == 0 ? calculationsListView.model.get(0).operand === "" : false); }
function clear() { displayedOperand = ""; if (enteringDigits) { const i = calculationsListView.model.count - 1; if (i >= 0) calculationsListView.model.remove(i); enteringDigits = false; } }
function allClear() { display.clear(); calculationsListView.model.clear(); enteringDigits = false; }
// Returns a string representation of a number that fits in // display.maxDigits characters, trying to keep as much precision // as possible. If the number cannot be displayed, returns an // error string. function displayNumber(num) { if (typeof (num) !== "number") return errorString;
// deal with the absolute const abs = Math.abs(num);
if (abs < 1) { // check if abs < 0.00001, if true, use exponential form // if it isn't true, we can round the number without losing // too much precision if (Math.floor(abs * 100000) === 0) { const expVal = num.toExponential(maxDigits - 6).toString(); if (expVal.length <= maxDigits + 1) return expVal; } else { // the first two digits are zero and . return num.toFixed(maxDigits - 2); } } else { // if the integer part of num is greater than maxDigits characters, use exp form const intAbs = Math.floor(abs); if (intAbs.toString().length <= maxDigits) return parseFloat(num.toPrecision(maxDigits - 1)).toString();
// Copyright (C) 2023 The Qt Company Ltd. // SPDX-License-Identifier: LicenseRef-Qt-Commercial OR BSD-3-Clause
import QtQuick import QtQuick.Controls
RoundButton { id: button implicitWidth: 48 implicitHeight: 38 radius: buttonRadius icon.source: getIcon() icon.width: 38 icon.height: 38 icon.color: getIconColor() // include this text property as the calculator engine // differentiates buttons through text. The text is never drawn. text: "bs" Accessible.name: "backspace"
property bool dimmable: true property bool dimmed: false readonly property color backgroundColor: "#222222" readonly property color borderColor: "#A9A9A9" readonly property color backspaceRedColor: "#DE2C2C" readonly property int buttonRadius: 8
function getBackgroundColor() { if (button.dimmable && button.dimmed) return backgroundColor; if (button.pressed) return backspaceRedColor; return backgroundColor; }
function getBorderColor() { if (button.dimmable && button.dimmed) return borderColor; if (button.pressed || button.hovered) return backspaceRedColor; return borderColor; }
function getIconColor() { if (button.dimmable && button.dimmed) return Qt.darker(backspaceRedColor); if (button.pressed) return backgroundColor; return backspaceRedColor; }
function getIcon() { if (button.dimmable && button.dimmed) return "images/backspace.svg"; if (button.pressed) return "images/backspace_fill.svg"; return "images/backspace.svg"; }
property bool dimmable: false property bool dimmed: false readonly property int fontSize: 22 readonly property int buttonRadius: 8 property color textColor: "#FFFFFF" property color accentColor: "#2CDE85" readonly property color backgroundColor: "#222222" readonly property color borderColor: "#A9A9A9"
function getBackgroundColor() { if (button.dimmable && button.dimmed) return backgroundColor; if (button.pressed) return accentColor; return backgroundColor; }
function getBorderColor() { if (button.dimmable && button.dimmed) return borderColor; if (button.pressed || button.hovered) return accentColor; return borderColor; }
function getTextColor() { if (button.dimmable && button.dimmed) return Qt.darker(textColor); if (button.pressed) return backgroundColor; if (button.hovered) return accentColor; return textColor; }