SVN은 바이너리 타입으로 데이터를 저장한다.
그리고 데이터는 zlib를 사용하여 압축하기 때문에 텍스트의 경우 상당한 공간 절약 효과가 있다 (CVS 대비)

테스트 삼아 CVS -> SVN 변환하면서 어느정도 용량의 차이가 있을까 궁금해서 캡쳐를 해보았다.


보시다시피, SVN은 CVS를 변환한 것임에도 불구하고 거의 1/4 크기 정도 밖에 되지 않는다. (25% 크기로 압축됨)

[참고 : http://stackoverflow.com/questions/458182/does-svn-compress-the-binary-content]


'프로그램 사용 > Version Control' 카테고리의 다른 글

svn tagging/branching  (0) 2009.08.20
SVN repository 구조  (0) 2009.05.11
cvs2svn 사용방법  (0) 2009.05.10
SVN의 단점  (0) 2009.05.08
svn 저장소의 위치  (0) 2009.05.08
Posted by 구차니
출근길에 SVN 설명서를 읽어 보니..

svn에 접속하는 방법으로는

file://
svn://
svn+ssh://
http://

정도가 있다고 한다.

근데.. http:// 를 이용하는 방법 외에는
svn 사용 로그가 남는 방법이 없다고 한다.

cvs에 비해서는 사용로그가 남지 않는 다는 건 관리자 측면에서는 아쉽지만,
사용자 측면에서는 아무런 아쉬움이 없으니 음..


[출처  : http://svnbook.red-bean.com/nightly/en/svn-book.pdf]
Posted by 구차니
예를 들어
/home/svn 이 svn의 저장소를 놓을 위치이고
그 아래에 각각의 프로젝트가 들어 간다면

저장소의 위치는 /home/svn이다.

svnserve -d로 구동할때 의 경로는 /home/svn이 되고
svn으로 checkout을 할때의 경로는 각 프로젝트를 넣어 준다.

예를 들어

/home/svn/proj1
/home/svn/proj2
가 있다면

svn://svnserver.ip.addr/proj1
이런식으로 접속하면 프로젝트에 대해서 보인다.

음.. 그런데 굳이 각각의 저장소로 여러개의 저장소에 구분을 해야 하는 이유가 있을려나..
그냥 repos 이런식으로 하나의 저장소만을 만들고
그 아래에 디렉토리/폴더로 구분하면 될텐데 말이다...

아무튼 각 저장소별 ./conf 디렉토리에는
passwd / auth / svnserve.conf가 존재하며

svnserve.conf의 주석 몇개와
passwd에 사용자 계정을 추가하면
svn:// 식으로 접속하여 사용이 가능하다.
svn+ssh://은 아직.. OTL


svnserve.conf
### This file controls the configuration of the svnserve daemon, if you
### use it to allow access to this repository.  (If you only allow
### access through http: and/or file: URLs, then this file is
### irrelevant.)

### Visit http://subversion.tigris.org/ for more information.

[general]
### These options control access to the repository for unauthenticated
### and authenticated users.  Valid values are "write", "read",
### and "none".  The sample settings below are the defaults.
anon-access = read
auth-access = write
### The password-db option controls the location of the password
### database file.  Unless you specify a path starting with a /,
### the file's location is relative to the directory containing
### this configuration file.
### If SASL is enabled (see below), this file will NOT be used.
### Uncomment the line below to use the default password file.
password-db = passwd
### The authz-db option controls the location of the authorization
### rules for path-based access control.  Unless you specify a path
### starting with a /, the file's location is relative to the the
### directory containing this file.  If you don't specify an
### authz-db, no path-based access control is done.
### Uncomment the line below to use the default authorization file.
# authz-db = authz
### This option specifies the authentication realm of the repository.
### If two repositories have the same authentication realm, they should
### have the same password database, and vice versa.  The default realm
### is repository's uuid.
# realm = My First Repository

[sasl]
### This option specifies whether you want to use the Cyrus SASL
### library for authentication. Default is false.
### This section will be ignored if svnserve is not built with Cyrus
### SASL support; to check, run 'svnserve --version' and look for a line
### reading 'Cyrus SASL authentication is available.'
# use-sasl = true
### These options specify the desired strength of the security layer
### that you want SASL to provide. 0 means no encryption, 1 means
### integrity-checking only, values larger than 1 are correlated
### to the effective key length for encryption (e.g. 128 means 128-bit
### encryption). The values below are the defaults.
# min-encryption = 0
# max-encryption = 256

passwd
### This file is an example password file for svnserve.
### Its format is similar to that of svnserve.conf. As shown in the
### example below it contains one section labelled [users].
### The name and password for each user follow, one account per line.

[users]
# harry = harryssecret
# sally = sallyssecret
userid = password

위의 경우는 사용자명 userid, 암호가 password인 경우이며,
svn에 수정/삭제 시 아래와 같이 인증을 요구하게 된다.


[참고 : http://www.pyrasis.com/main/Subversion-HOWTO#s-4.3]
Posted by 구차니
cvs2svn 이라는 유틸리티를 사용하면 된다고 한다.

[발견 : http://sam.zoy.org/writings/programming/svn2cvs.html]
[공식 : http://cvs2svn.tigris.org/]

'프로그램 사용 > Version Control' 카테고리의 다른 글

SVN의 단점  (0) 2009.05.08
svn 저장소의 위치  (0) 2009.05.08
TortoiseSVN 내장 Diff 사용시 주의사항 및 프로그램 소개  (2) 2009.03.10
CVS / SVN 차이점?  (2) 2009.03.06
SVN 사용기  (0) 2009.03.05
Posted by 구차니
TortoiseSVN에는 Diff / Merge 툴이 내장되어 있다.
Diff/Merge 프로그램은 외관상으로는 WinMerge와 유사하고, 동일 프로젝트를 변형해서 사용하는게 아닐까라는 생각이 든다.
아무튼 이러한 개인적인 추측은 패스하고~ 장점과 단점을 말하자면 다음과 같다.

   WinMerge  TortoiseMerge
 Syntax Highlight  지원  미지원
 UTF-8 지원  지원  미지원
 네비게이션 부분 확대  미지원  지원


일반적인 소스를 다루는 경우에는 UTF-8 을 굳이 지원해야 할 필요는 없지만,
현재 다국어지원 작업을 하는데 UTF-8을 지원하지 않는 다면 아래와 같이 선택할 경우에 글씨가 깨지는 문제가 발생한다.


TortoiseMerge - 좌측의 네비게이션 부분확대가 매력적이다. (확대해서 비교해 보세요!!)
색상이 있는 줄이 차이점 부분이 확대된 것이고, 아래의 흐릿한 선들이 원래 크기의 차이점 부분표시이다.

WinMerge - 네비게이션을 제외하면 전반적으로 WinMerge가 낫다


구버전의 TortoiseCVS의 경우에는, 기본 비교/병합 프로그램이 없어, 무조건 하나만 입력이 가능한 단점이 있었지만,
TortoiseSVN은 내장 비교/병합 프로그램이 있어서, 사용하지 않더라도 외부 프로그램의 링크는 사라지지 않아 좋다.


남아있는 External Link (화면 배색문제로, 일반적인 pc에서는 회색으로 보임)


또 다른 TortoiseSVN의 내장 비교툴로 IDiff가 있다(Image Diff)
말그대로 이미지를 비교 하는 것인데, I가 굴림체인지라 Diff밖에 눈에 안들어 온다.


위의 이미지가 이미지 비교 프로그램, 아래는 소스 비교 프로그램

이 포스트에 들어간 이미지 a.png와 c.png를 비교한 화면이다

비교 옵션 중 겹쳐보기로 본 비교화면 (Overlay Mode)

비교 옵션 중 혼합 겹쳐보기로 본 비교화면 (Overlay Mode + Alpha Blend)
Posted by 구차니
CVS만 2년 정도 사용했다.
물론 branch 까지는 사용해보지 않았고,
주로 사용하던 기능은 history와 tag 뿐이었다.

아무튼 이렇게 CVS만 쓰다가 SVN을 사용해봤는데,
처음 사용할때의 어색함인지, 상당히 다른 느낌이 든다.

일단 CVS는 module 단위였는데 SVN은 그러한 구분이 없다는 사실.
어쩌면 구형 TortoiseCVS를 사용해서 그럴지도 모르겠다는 생각이 든다.
신형 TortoiseCVS의 경우에는 물론 module단위로 만들기는 하지만,
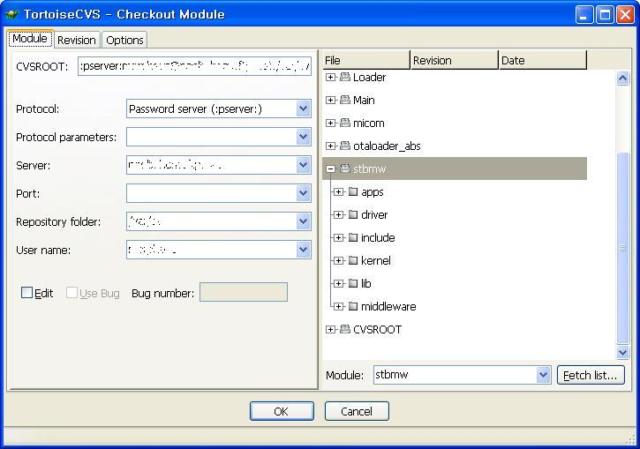
module 목록을 combobox가 아닌 listbox로 보여 주기 때문에, 기존 버전보다는
확연히 구분되어 있다는 느낌이 적게 들었다.

하지만, SVN은 이러한 '프로젝트'의 느낌보다는, 이력이 남는 '파일 저장소'라는 느낌이 강하게 든다.
(아마 파일 이동의 편의성과, checkout시 URL로 입력하는 특성때문일 것이다)


CVS 구버전 UI

CVS 신버전 UI

Posted by 구차니
CollabNet Subversion Server and Client v1.5.5 (for Windows) 를 다운로드 하려면 가입이 필요하다.

설치 화면은 간단한데 svnserve와 apache용 MOD_DAV_SVN을 옵션으로 고를 수 있다.

svn 서버 설정화면으로 포트와 repository를 정해주면 된다.

설치를 완료 하면 자동으로 c:\svn_repository 가 생성된다.
하지만 내용이 하나도 없어서 svn이 접근을 하지 못한다는 에러가 발생한다.

그리고 "Install svnserve to run as Windows service" 일뿐, service가 실행되지는 않는다.
물론 리부팅하면 자동으로 시작이 되긴하겠지만, 설치 직후 안된다면 service가 실행시켜 주면 된다.


authorization failed가 뜨면 아래의 링크를 참조하여 해결하면 된다.

5) Configure permissions for the repository

  • Open with notepad the repository configuration C:\SVNREPOSITORY\conf\svnserve.conf
    and paste just the following lines (remove everything else):
    [general]
    anon-access = none
    auth-access = write
    password-db = passwd.conf
    authz-db = authz.conf
    #realm = My First Repository

    Please note that I renamed "passwd" to "passwd.conf" and "authz" to "authz.conf" both
    in the config file here, and in the filesystem too, so I can just associate the conf extension with notepad and make my life easier.

    Note also that when a realm is not specified, it will be assumed to be the repository guid (created when you created repository). Realms should be unique among different repositories, unless you want to share the same permissions among them.
  • Rename authz to authz.conf
  • Rename passwd to passwd.conf
  • Open passwd.conf with notepad and put some users/passwords by pasting the following lines (remove everything else):
    [users]
    admin = qwerty147
    ricardo = pwd123
    marcelo = pwd456
    joao = pwd789
  • Now open authz.conf with notepad and paste just the following lines (remove everything else):
    # guests will have read permission in all repository
    # writers must include all non-admin users who must have write
    #    permission on some folder (read permission on root is needed for that)
    [groups]
    admins = admin, ricardo
    writers = marcelo
    guests = joao
    project1 = marcelo

    [/]
    @admins = rw
    @writers = r
    @guests = r
    * =

    # please note that permissons (ex: admins group) don't propagate from root to subprojects
    [/Project1]
    @project1 = rw
    @admins = rw
    * =
  • Now you can try again mkdir:
    C:\>svn mkdir svn://localhost/Products
    Authentication realm: e9852c7c-f11f-1946-b4a8-49fa8b53a267
    Password for 'Ricardo': ******


    Please note that it will by default assume your username is the same as your windows login. If it is not, just put any password, and it will ask you for your correct username.
  • If everything went ok you will get a message like "Committed revision 1"

    Congratulations! You have made your first change to the repository.

    Now let's create another folder: C:\> svn mkdir svn://localhost/Projects
    The password won't be asked this time, because it's cached for your user (Documents and settings\username\Application Data\Subversion\auth\)

[출처 : http://www.smarter-technologies.com/smarter/Default.aspx?tabid=128&EntryID=12]

svn_repository의 내부 구조 & conf 내용물들

svnserve.conf의 기본 내용. 전부 주석처리다 ㄱ-

passwd는 사용하는 계정에 대한 아이디/암호를 저장한다.

이녀석은.. 아무튼 인증파일이다. 특정 리파지터리에 특정 유저의 권한을 설정한다.


심심해서 해본 뻘짓

[다운로드 : http://www.collab.net/downloads/subversion/] <- 가입필요
[다운로드 : http://subversion.tigris.org/servlets/ProjectDocumentList?folderID=91]

'프로그램 사용 > Version Control' 카테고리의 다른 글

CVS / SVN 차이점?  (2) 2009.03.06
SVN 사용기  (0) 2009.03.05
TortoiseSVN 사용하기  (2) 2009.02.26
TortoiseSVN - Svnserve Based Server  (5) 2009.02.26
cvs 서버 설치 / 복원  (2) 2009.01.22
Posted by 구차니
CVS의 경우는 CVSNT 와 TortoiseCVS로 서버 및 클라이언트 환경을 구축할 수 있다.
하지만 SVN의 경우는 TortoiseSVN만으로도 서버를 구축 할 수 있다.
물론 svn:// 으로 접속은 하지 못할지라도 말이다(아직 설정법을 모르니 혹시 모름)

ToroiseSVN을 설치 하면 다음과 같은 context-menu가 생긴다(현재 빵집/CVS/SVN/WinMerge가 설치되어 있다)

CVS에서도 그러했 듯, SVN에서도 repository는 있어야 한다.
아무것도 없는 빈 폴더를 하나 만들고, 그 안에서 Create repository here를 눌러준다.

아래의 파일들이 생성되며 repository가 생성되었다는 메시지가 뜬다.
d:\svn_repo 라는 경로로 생성했다.

일단은 SVN에 저장할 파일을 찾아본다. 원하는 폴더를 클릭해서 Import 한다.

Import 에서는 저장할 repository의 경로를 넣어준다.
위에서 d:\svn_repo에 저장소를 생성했으므로 file://d:/svn_repo가 URL이 된다.

import가 완료되었다.
(repository에 파일이 Add 되었다)

저장소에 넣었으니(import) 이제 저장소에서 꺼내오자(checkout)
경로는 저장한 경로와 동일하게 넣어 주고, 받아와서 저장할 경로를 지정해 준다.
아까는 경로를 지정해 주지 않았으므로 받을 곳에 디렉토리를 하나 추가해준다.

checkout 장소에 파일이 Add 되었다.

SVN 클라이언트가 있으면 체크가 생긴다. 녹색은 서버와 동일하다는 의미이다.
빨간색은 서버와 동일하지 않은 내용이 담겨 있다는 의미이다.

TortoiseSVN의 가장 강력한 점은 바로 Repositoty Broswer가 아닐까 생각이 된다.
원래 file://d:\svn_repo에 존재하던 po 파일들을, Create Folder를 사용하여 po를 만들고
단순하게 드래그 해서 po로 넣었더니 간단하게 이동이 되었다.
CVS는 경로이동이 불가능 한 단점이 있는데 SVN은 이렇게 편하게 이동 할 수 있다.

TortoiseSVN에 내장된 Merge 툴이다.

Checkout 창에서 Show Log를 누르면 뜨는 창
revision은 cvs는 파일별로 생겼지만, svn은 전체 저장소에 대해서 생성이 된다.
어떻게 보면 더욱 좋은것이, 태그의 확장 판으로 어떠한 행동을 했었는지 추적이 가능하고
그 때 이후의 버전을 세부적으로 받아 올수 있다. 이러한 작업은 CVS에서는 매번 tag를 해야만 가능하다.

위의 창에서 통계를 누른 모습이다. cvs에서는 역시 볼 수 없었던 기능이다.


예전부터 설치만 해 놓고 쓰지 않던 svn을 끄집어 내서 한번 서버 설치를 해보려니 결국은 또 실패로 돌아 갔다.
하지만 이렇게 클라이언트/ 개인용 서버로 사용하는 법이라도 알았으니 위안으로 삼고,
다음번 문서에 svnserve로 공용 서버 만드는 법만 추가 하면 될 듯하다.
Posted by 구차니
솔찍히 내가 TortoiseCVS Client for Windows에 쩔어 있어서
콘솔에서 명령어로 체크아웃 할지도 모르고, SVN에는 손이 가지 않는다.

SVN의 장점으로는 디렉토리 이동 등이 있다는 것도 알고,
CVS에서 SVN으로 이전도 그리 어렵지는 않다고 하지만,

가장 큰 문제는, 나 혼자 사용하는 SVN 서버가 아닌
다른 사람들도 접속할 수 있는 SVN 서버를 만드는 법을 모른다는 것이다.

아무튼! 용기를 내서 한번 문서를 뒤적이다가 발견했는데..
TortoiseSVN Client for Windows help에 있었다.. OTL 역시 등불밑이 가장 어두운 것인가..


키워드는 svnserve 이다.

Running svnserve

Now that svnserve is installed, you need it running on your server. The simplest approach is to run the following from a DOS shell or create a windows shortcut:

svnserve.exe --daemon

svnserve will now start waiting for incoming requests on port 3690. The --daemon switch tells svnserve to run as a daemon process, so it will always exist until it is manually terminated.

If you have not yet created a repository, follow the instructions given with the Apache server setup the section called “Configuration”.

To test that svnserve is working, use TortoiseSVNRepo-Browser to view a repository.

Assuming your repository is located in c:\repos\TestRepo, and your server is called localhost, enter:

svn://localhost/repos/TestRepo

when prompted by the repo browser.

You can also increase security and save time entering URLs with svnserve by using the --root switch to set the root location and restrict access to a specified directory on the server:

svnserve.exe --daemon --root drive:\path\to\repository\root

Using the previous test as a guide, svnserve would now run as:

svnserve.exe --daemon --root c:\repos

And in TortoiseSVN our repo-browser URL is now shortened to:

svn://localhost/TestRepo

Note that the --root switch is also needed if your repository is located on a different partition or drive than the location of svnserve on your server.

Svnserve will service any number of repositories. Just locate them somewhere below the root folder you just defined, and access them using a URL relative to that root.


Run svnserve as a Service

Running svnserve as a user is usually not the best way. It means always having a user logged in on your server, and remembering to restart it after a reboot. A better way is to run svnserve as a windows service. Starting with Subversion 1.4, svnserve can be installed as a native windows service.

To install svnserve as a native windows service, execute the following command all on one line to create a service which is automatically started when windows starts.

sc create svnserve binpath= "c:\svnserve\svnserve.exe --service 
--root c:\repos" displayname= "Subversion" depend= tcpip
start= auto

If any of the paths include spaces, you have to use (escaped) quotes around the path, like this:

sc create svnserve binpath= "
\"C:\Program Files\Subversion\bin\svnserve.exe\"
--service --root c:\repos" displayname= "Subversion"
depend= tcpip start= auto

You can also add a description after creating the service. This will show up in the Windows Services Manager.

sc description svnserve "Subversion server (svnserve)"

Note the rather unusual command line format used by sc. In the key= value pairs there must be no space between the key and the = but there must be a space before the value.


[출처 : http://tortoisesvn.net/docs/release/TortoiseSVN_en/tsvn-serversetup-svnserve.html]
Posted by 구차니